All the excitement about the 'publication' of the Twisty Top pattern made me think about those other tutorials I've made...
There should be quite a few. Both 'proper' ones and little things, made in response to questions about clothes I made.
In this post, I will collect all the links for you, to make finding them easy.
Going back through all those old how-tos and tutorials, I reliased how much I've learned about making such things... So you are warned, although none of the tutorials I link to are 'bad' per se, some are definately a bit sketchy and using them may require existing sewing skills and/or insight in the workings of sewing patterns. Also, a lot of them are instructions about drafting simple patterns, without sewing instructions.
Well, here we go.
On this blog there are, starting with the most recent:
- the announcement of the Twisty Top, with link to the pattern on Burdastyle
- A pattern tutorial to turn a normal trouser pattern into one with a wide stretchy waistband (which I did for my mother)
- Some pointers on how to sew Pattern Magic's curve collar. This one is only useful if you own the book.
- A pattern tutorial for my half circle culottes.
- This one is not really a tutorial at all, I made the post as a reply to a comment. It's about the fabric lay-out for a kimono sleeve knit top. This one.
- Here is a tutorial, pattern and construction, for this cardigan/shrug.
- Another bit of general information: my personal 'how much fabric do I need' guide.
- A little drawing about how to make this alternative trouser leg shape.
- Instructions for the pattern and sewing of a knit top which has drapey cowl front with a high back neckline.
- An explanation on how to insert a double box pleat, mostly pattern-wise. You know, like the one in this skirt.
- Instructions on how to make the pattern for my free-form top.
- A pattern how-to for this twirly gored skirt.
- Instructions for the pattern and sewing of the 'tiny shrug'.
- A sketch and some words on how to alter trouser leg pattern pieces for different looks.
- Instructions on how to make a back drape bit on a pencil skirt.
- A sketchy how-to for a grocery bag.
- Some revealing diagrams about the construction of a Watteau pleat, like the one I made in this dress.
- A list with sewing term translations from Dutch to English (useful for those of you who sew from Knipmode but don't speak Dutch)
And on Burdastyle there are:
- Obviously the Twisty Top pattern.
- A pattern for a jeans skirt. Be warned, this is an old one and not up to the standard of the Twisty Top, it used to have instructions, but those got lost in the re-design of the Burdastyle site.
- A pattern tutorial for a 'winged cardigan'.
- A how-to on drafting a dress with front and back pleat, based on a t-shirt pattern.
- A how-to for giving a knit top a simple flutter sleeve.
- And a tutorial on how to make a very simple draped neckline on a knit top.
For all of the above counts the same thing: please feel free to use them and link to them! And I'd love it even more if you drop a comment if you've made something using any one of my tutorials.

August 29, 2012
August 28, 2012
Home again!
That holiday in Bavaria I was talking about in my latest post? I was on it when I wrote that. E and I returned home on Friday evening. We're both back to work since Monday and settling back into our everyday routine.
 We've been away for two week and spent most of that time in the south on Bavaria, in or close to the first mountain ranges of the Alps. The weather was great (except for one day) and we've really enjoyed ourselves. We did some hiking and visited some castles.
 In the mountains, those were the romantic fantasies of 19th Bavarian kings, with Neuschwanstein as the prime example.
 A lot further norths, there were real medieaval castles and towns, like the castle of Harburg.
These are all pictures E took with the digital camera. I used a really old little analog one, for a bit of fun. But, obviously, I still have to get the pictures developed. I tried to record of few things of textile interest so if those pictures are any good, I'll show them later.
Back home, I have to try and re-capture my sewing and blogging mojo. So far, it's another case of lots or ideas and no action, but I'm confident that all will be well soon enough.
August 18, 2012
The Bavarian issue
Hi everyone and thank you for all the nice comments this last week. I really hope you will enjoy the pattern and if you were wondering about the neat finishes on that swimwear: you haven't seen my first efforts a few years ago, with the sewing machine which ate lycra...
Right now, I'd like to talk about something I noticed on holiday in Bavaria.
You know how Burda does those dirndl patterns, just about every year? In the process annoying what seems like the entire sewing world ( ok, that's just judging from those few blogs I read) by wasting so much space in what could have been a perfectly good October issue?
Well, a visit to Bavaria puts it all into perspective. I have, in fact, been to other parts of Germany in the past, and that didn't make much difference.
The dirndl, as you may know, is the traditional women's dress of Bavaria. Along side it, men should wear lederhosen.
As one might expect, waitresses in touristy areas wear dirndls and some souvenir shops sell them. And of course we are reminded that dirndl and lederhosen are the appropriate clothes for the Oktober Fest.
All of that makes sense and doesn't justify Burda's ongoing infatuation. However, I came across a wedding party in the small town of Oberammergau, and all of the guests were in traditional dress. At the same day, there was also a feast put on by the local "traditional dress community" (pictures are from their opening parade) where a lot of people wore these clothes.
Even adding to that, I learned that, in the mid 19th century, the Bavarian king Maximilian II actively supported the wearing of dirndl and lederhosen and even managed to popularize it in the rest of Germany.
Incidentally, the first Oktober Fest was held in 1810 to celebrate the wedding of his father, then crown prince and later king Ludwig I.
So, the dirndl is alive and kicking in Bavaria. I even found a sewing magazine dedicated to the phenomenon...
And I think historical precedent and the popularity of the Oktober Fest to well beyond the German borders are what makes Burda offer it's readers their version...


August 11, 2012
Bikini after all
For most of the year, I don't even think about swimwear. I'm not a regular swimmer and I prefer the beach for long walks on windy autumn days... But a bikini would come handy for my (late) summer holiday.
So, I decided to leave the wacky world of underwiring for now (no doubt I will return there later) and concentrate on making something (relatively) quick and wearable. I had some nice quality black lycra in my stash (bought for my retro swim suit but there was plenty left) and bought more new elastic. The lycra actually matched my old H&M hipster bikini bottom, so if all else failed, I'd be fine if I just made one OK top.
I planned on making a very simple longline bandeau top (a.k.a. a boob tube) to match the old hipster, and a high-waisted bikini bottom with a gathered bandeau top. The longer top and the bottom were drafted based on my lingerie slopers and for the last piece, I used this tutorial from pattern school. I really recommend that site: lots and lots of information about 'close-fit stretch-wear patterns' i.e. swim, dance and exercise wear. Just no real sewing instructions, so only easy to use if you sort of know what you're doing. My bikini top was drafted completely according to the instructions for the gathered bandeau, just with a smaller hole at center front and with the strap knotted at the top of the bandeau.
I'm very happy to report that this time, it all worked out.
I even had the audacity to try that blind finish again on the high waisted briefs and the gathered top. This time, I found a better lining, calculated the turn of the cloth better and it worked like a charm.
 Here you can see the top edges of the longline bandeau, with a conventional finish.
 And here are the top edges of the gathered bandeau, smooth on the outside and with the seam and a zigzag on the inside.
You may notice some waving in the elastic (especially in the top picture). Although with the tops flat on the table, this may look like a problem, it is a solution. This stuff, Gold-Zack 1 cm wide transparant elastic, was the only thing remotely like swimwear elastic I could find. It looks the part but I found out in my attempts with the grey bikini just how sturdy this stuff is... So I decided to stretch it slightly less than the lycra to prevent uncomfortable and unsightly cutting.
By now, you may wonder what these bikini's actually look like... Well, here we go:

RTW bottoms, longer top.


High waisted bottoms, gathered top (by the way, this thing is surprisingly supportive)


So, I decided to leave the wacky world of underwiring for now (no doubt I will return there later) and concentrate on making something (relatively) quick and wearable. I had some nice quality black lycra in my stash (bought for my retro swim suit but there was plenty left) and bought more new elastic. The lycra actually matched my old H&M hipster bikini bottom, so if all else failed, I'd be fine if I just made one OK top.
I planned on making a very simple longline bandeau top (a.k.a. a boob tube) to match the old hipster, and a high-waisted bikini bottom with a gathered bandeau top. The longer top and the bottom were drafted based on my lingerie slopers and for the last piece, I used this tutorial from pattern school. I really recommend that site: lots and lots of information about 'close-fit stretch-wear patterns' i.e. swim, dance and exercise wear. Just no real sewing instructions, so only easy to use if you sort of know what you're doing. My bikini top was drafted completely according to the instructions for the gathered bandeau, just with a smaller hole at center front and with the strap knotted at the top of the bandeau.
I'm very happy to report that this time, it all worked out.
I even had the audacity to try that blind finish again on the high waisted briefs and the gathered top. This time, I found a better lining, calculated the turn of the cloth better and it worked like a charm.


You may notice some waving in the elastic (especially in the top picture). Although with the tops flat on the table, this may look like a problem, it is a solution. This stuff, Gold-Zack 1 cm wide transparant elastic, was the only thing remotely like swimwear elastic I could find. It looks the part but I found out in my attempts with the grey bikini just how sturdy this stuff is... So I decided to stretch it slightly less than the lycra to prevent uncomfortable and unsightly cutting.
By now, you may wonder what these bikini's actually look like... Well, here we go:

RTW bottoms, longer top.


High waisted bottoms, gathered top (by the way, this thing is surprisingly supportive)


August 10, 2012
Yes!!

Unfortunately, after the latest revision of the site, member patterns are only 'projects you can make' and no longer appear in the pattern list (now called 'pattern store'), but make no mistake: this is a pattern.
It's here (if you don't have a Burdastyle account and you want this pattern, you can of course email me. the adress is in the sidebar on the right)


August 7, 2012
Don't... even... ask...
Don't worry, it's not the twisty top pattern I'm talking about. In fact, I've made good progress on that over the weekend. All I need to do now is make it again in order to take step-by-step pictures for the instructions. And write those instructions, of course. In fact, I planned to do that today but I got distracted by another project...
At some moment last week, I decided to make a bikini. I had fixed the little issue with the bust gathers on last year's retro swim suit and that made me realize two things: 1. with my serger and this sewing machine, sewing lycra is not something to be afraid of at all (I did a lingerie workshop with my old sewing machine, the jersey-eating maniac with feeding dog issues and that memory really stuck with me) and 2. I love that bathing suit, but in some cases, a bikini is just more practical/nicer.
I threw out my many years old RTW bikini in early June. The top had lost a lot of colour and it never fit properly in the first place. I looked for bikinis in the shops but although they were cheap and plentiful, I returned empty-handed both times. The problem there were the bikini bottoms... Apperantly, fashion dictates those should be very, very low indeed. Of course, I could look in a wider variaty of stores, but stores which sell bottoms which are eh... more revealing generally don't acknowledge my bust size...
So, with realisation 1 in mind, why not make my own? I even had some jersey in my stash.
I decided on a lovely deep grey lycra which I bought at Kantje Boord during the November blogger meeting. It was just an off-cut but it should be just enough for a bikini.
 And then, things got tricky. Of course, I wanted to draft my own pattern. I didn't those lingerie classes for no reason. In itself, that's fine. It's how I do all my sewing. I just knew I had to check the cup-size which was too small in my first bra. Then, I found I had already drafted a larger one for my bathing suit (which has stretchy material for the cups...), so I thought I might as well go with that.
My design was for simple, fairly high-waisted bottoms and an underwired bra-style top with an interesting tied front. And I decided to try and incorporate a detail from RTW:

 This year, the design of my favorite bra (H&M's 'our perfect racerback', in case you're wondering) changed from this, elastic applied in two passes,

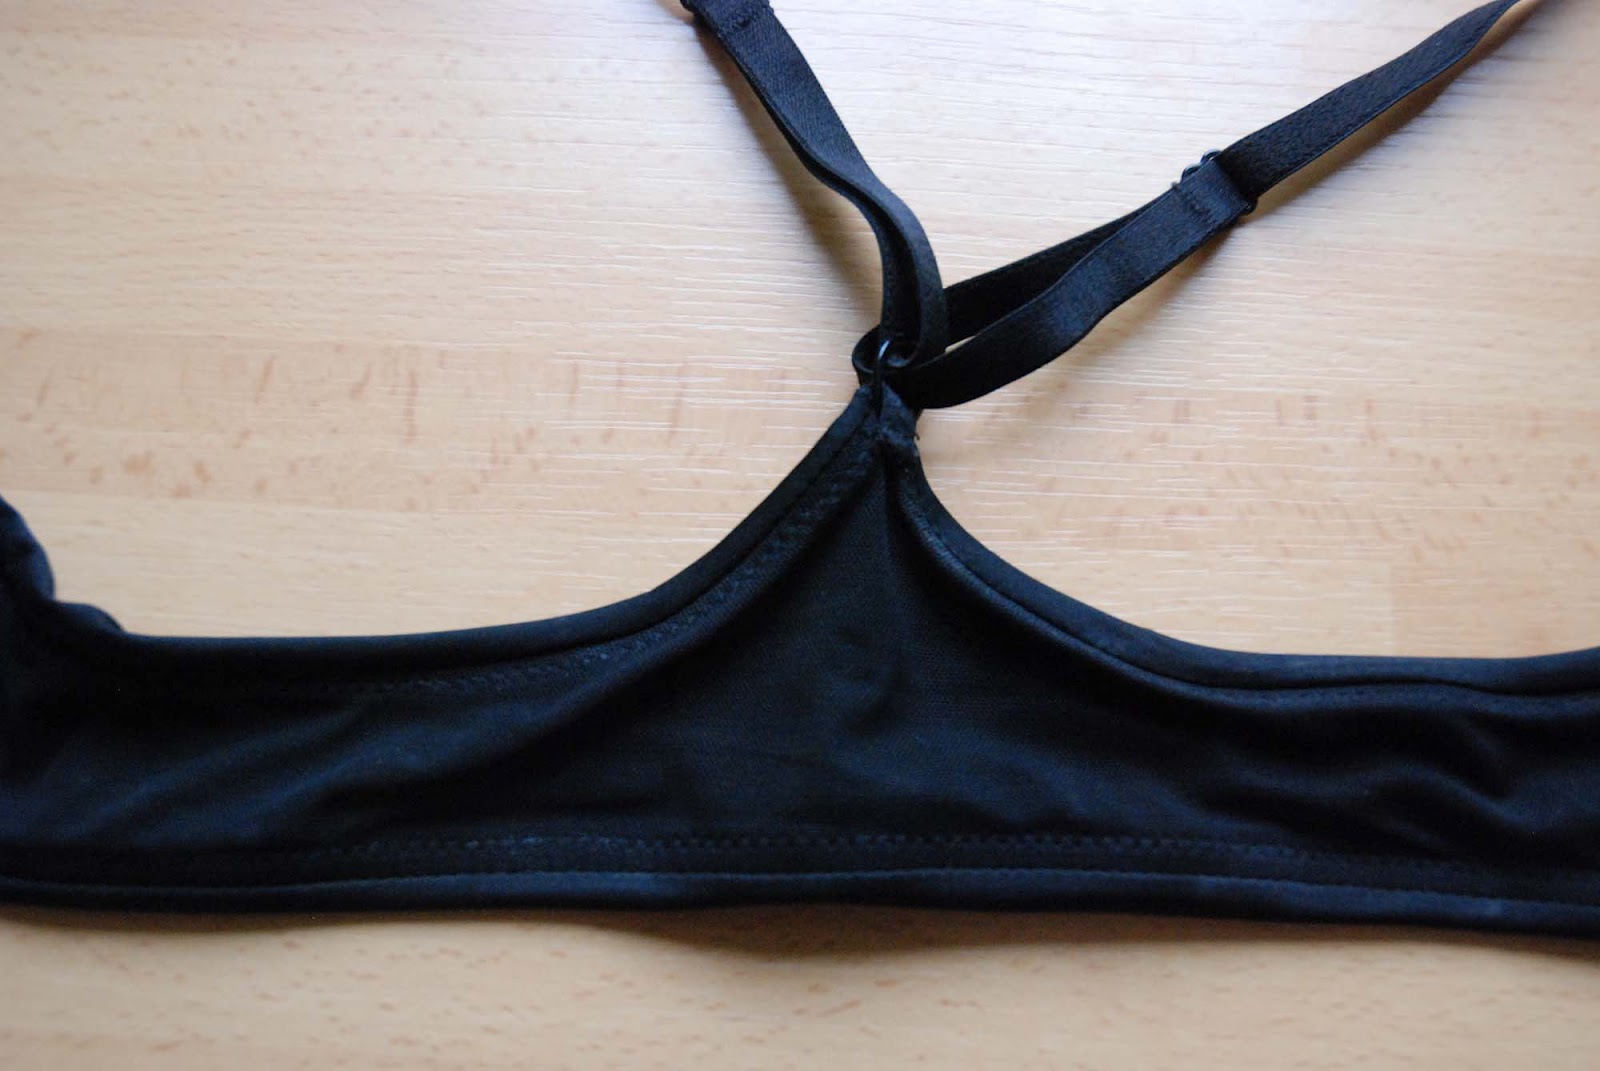
 to this this, lining with elastic serged to the inside which provides a very nice topstitching-free look at the outside.
This was a bit of a nightmare. Good cup-size or not, I could have finished this bikini three times oven by now if I had just done it the normal way. Even the bottoms took me the better part of a day to finish (the only lining I had for those was more stretchy that the lycra, which caused all kinds of problems) and that sorry little thing in the picture at the start of this post, that's what the top looks like now... Ok, it's only half of it but still...
There isn't a single section of this project which I didn't unpick at some point. In some cases the material let me down, like the stretchy lining or the overly firm new elastic. I other cases I just hadn't thought it out far enough. Usually, I can envision the order of construction of any given project even before I draft it but in this case it was a realy learning curve. I should be frustrated (and I probably will be if I don't end up with a wearable result) but I'm still loving the challenge.
At some moment last week, I decided to make a bikini. I had fixed the little issue with the bust gathers on last year's retro swim suit and that made me realize two things: 1. with my serger and this sewing machine, sewing lycra is not something to be afraid of at all (I did a lingerie workshop with my old sewing machine, the jersey-eating maniac with feeding dog issues and that memory really stuck with me) and 2. I love that bathing suit, but in some cases, a bikini is just more practical/nicer.
I threw out my many years old RTW bikini in early June. The top had lost a lot of colour and it never fit properly in the first place. I looked for bikinis in the shops but although they were cheap and plentiful, I returned empty-handed both times. The problem there were the bikini bottoms... Apperantly, fashion dictates those should be very, very low indeed. Of course, I could look in a wider variaty of stores, but stores which sell bottoms which are eh... more revealing generally don't acknowledge my bust size...
So, with realisation 1 in mind, why not make my own? I even had some jersey in my stash.
I decided on a lovely deep grey lycra which I bought at Kantje Boord during the November blogger meeting. It was just an off-cut but it should be just enough for a bikini.

My design was for simple, fairly high-waisted bottoms and an underwired bra-style top with an interesting tied front. And I decided to try and incorporate a detail from RTW:


This was a bit of a nightmare. Good cup-size or not, I could have finished this bikini three times oven by now if I had just done it the normal way. Even the bottoms took me the better part of a day to finish (the only lining I had for those was more stretchy that the lycra, which caused all kinds of problems) and that sorry little thing in the picture at the start of this post, that's what the top looks like now... Ok, it's only half of it but still...
There isn't a single section of this project which I didn't unpick at some point. In some cases the material let me down, like the stretchy lining or the overly firm new elastic. I other cases I just hadn't thought it out far enough. Usually, I can envision the order of construction of any given project even before I draft it but in this case it was a realy learning curve. I should be frustrated (and I probably will be if I don't end up with a wearable result) but I'm still loving the challenge.
August 3, 2012
Starting slowly
Obviously, inevitably, I had a whole lot of other things to do today before I could get started on digitalizing the twisty top pattern. Now, just before I have to start making dinner, I've managed to divide the pattern pieces into A4 chunks, scan those and re-assemble them.


They look like this now. I plan to import them into Illustrator, clean up those lines and then grade them with the help of Illustrator's grid (at least, I hope that'll work).
Before, when I made the pattern for the jeans skirt I put on Burdastyle, I graded by hand, with the pattern pieces on a large sheet of paper which I then cut up for the scanner. I hope using Illustrator (which I couldn't work with back then) will take less time and result in a clearer and cleaner looking final pattern.
Of course, after grading, I will have to divide the finished pattern into numbered A4 pieces for printing and check the pattern. I will also have to try and write clear instructions. For this, I plan to make the top again and take step-by-step pictures.
This is why I usually share tutorials instead of patterns...
August 2, 2012
Here I go again...
This is shaping up to be the year of the jumpsuit... This is my latest creation: a playsuit which is a bit more like the jumpsuits and playsuits you'd find on the highstreet: an easy-fitting one.
 I made it from a small and irregularly shaped piece of drapey viscose/rayon which was left over from one of my wilder trouser-shape experiments.
The hot weather we've had in the past two weeks has made me realise that although I have quite a few very charming summer-y looking dresses and other outfits, I don't own quite as many which are actually good in real summer weather... After all, a well-constructed strapless dress has to be lined and boned and a tight fit usually makes a garment feel warm, no matter what the material or the construction.
 It's a very simple piece of clothing: cut-on capsleeves, a short front zipper, a waistseam with elastic sewn to the seam allowance, and short wide legs with slant pockets. (please ignore my very white legs... they haven't seen much of the sun yet)
 To be honest, this playsuit is also more than a little inspired by my time working with M. In her collection, which we presented at Modefabriek, there were no less than three easy-fitting jumpsuits. However, this really is my own interpretation inspired by her esthetic. All hers had long, tapered legs and were in fact too bulky at the top and waist to suit me (although they were great on other people).
 The loose cut and elasticated waist meant I could make do with just a short zipper. I chose one of the thin metal ones I bought recently and a applied it in a favorite way of mine: like a blind zipper. I love this look for metal zippers and I'm always surprised no-one else seems to be doing this.
P.S. Tomorrow, I'm going to start on grading the twisty top. Maybe I'll do some 'progress reports' but I'm planning to upload next week.

The hot weather we've had in the past two weeks has made me realise that although I have quite a few very charming summer-y looking dresses and other outfits, I don't own quite as many which are actually good in real summer weather... After all, a well-constructed strapless dress has to be lined and boned and a tight fit usually makes a garment feel warm, no matter what the material or the construction.


P.S. Tomorrow, I'm going to start on grading the twisty top. Maybe I'll do some 'progress reports' but I'm planning to upload next week.
Subscribe to:
Posts (Atom)