November 30, 2015

Toiles!

Right until the moment I started to take pictures for this blog post, I thought I had an easy answer.
Yesterday, before I went to the climbing hall, I sewed up very simple toiles of both of those patterns. A quick try-on showed me that on the half kimono-sleeve one, my alterations had worked. The raglan one had a nice clean fit under the arm but a weird bulge in front of each shoulder, a to-be-expected consequence of that trick I used on the sleeve so I wouldn't have a dart in the sleeve. 
The outcome seemed clear: Just make the half-kimono-sleeve one, the best one overall.

And then, I tried both on again today... A bit more carefully... (oh, and don't pay attention to the odd seam on the collar. I only made the under collar for the toile because it is quicker and the facing does not actually change the shape) 

This is the half-kimono-sleeve jacket:


The shape works but that big sleeve gives quite a bit of excess fabric under the arm. That is a normal result of this sleeve style so it can't really be removed. Not without seriously compromising freedom of movement.
Oh, and I should lengthen the jacket at center back and adjust that bottom edge to be a nice smooth line.

And this is the raglan one: 


No bulging fabric under the arm here. The weirdly placed excess material in front of the shoulders is on the seam lines, so it is easy to take in. With that issue out of the way, this version starts to look really good.
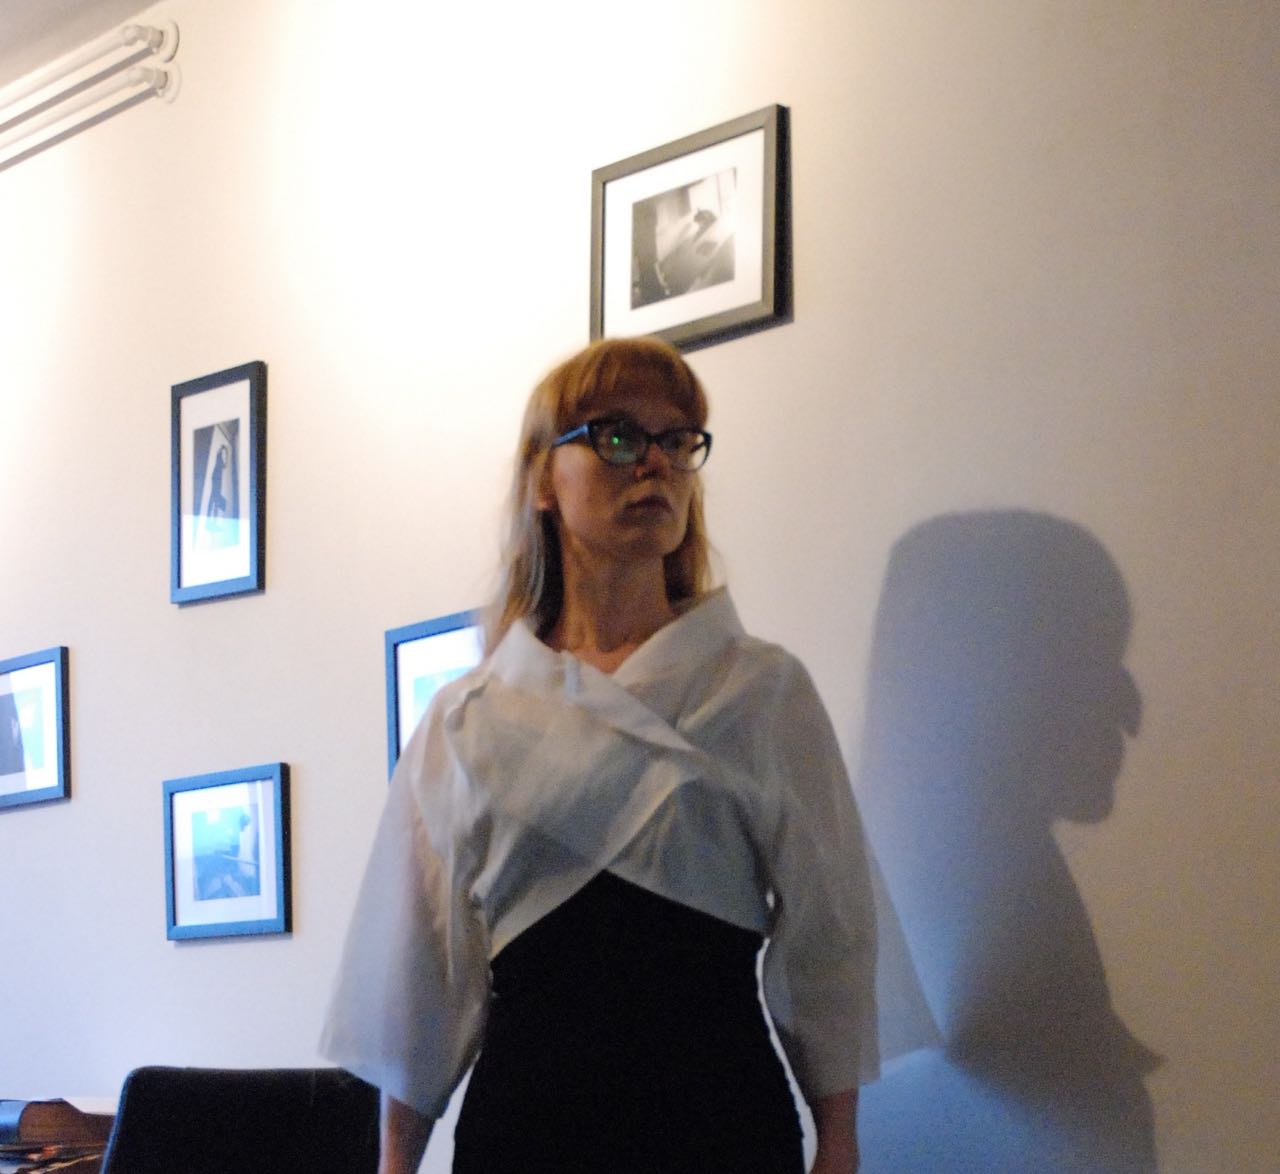
It also needs some more length at center back and the front bodice should be taken in a bit at the bottom edge. 

With the adjusted raglan version, the only really difference seems to be in that forward tilt of those sleeves.
Of course, I am never going to get that sculpted effect in this very thin fabric. My real fabric is thicker and I don't mind using some light interfacing but I won't go all-out with horsehair and heavy tailoring. 
But the shape is clear: Those sleeves curve forward and the hem looks shortest at the front. I can adjust the hem of my sleeve any way I like but that curve is a bit more difficult. I might take in the front seams (on either version) a bit. That would help a bit. The original may have the seam in an unusual place, more to the front (or have an extra seam) in order to get that shape. With my softer and slightly stretchy fabric, I don't think I'll bother though.
Which one to choose?

November 28, 2015

Some pattern making

Today, I finally had a chance to work on that jacket pattern. In your comments to my previous post, some people asked about the pattern so I thought I would show it to you.

When working on the alterations I had described, I also kept thinking about making a real raglan sleeve version. That might make the acute angle between the lower edge and the bottom of the sleeve a bit more natural. I ended up drafting both. I will make a muslin of each and see which one I like best. 

This is the old pattern piece for the front (all pattern pieces are without seam allowances or anything like that). See that narrow, straight collar piece? That was my problem. I can't show you the old back-and-sleeve piece because I re-used it to make the new version.

This is the new half-kimono-sleeve version. I you look closely, you can even see where I added width to the sleeve. I also added so width to the bottom of the side seam to compensate for what I took away on the front pattern piece (where I needed to remove some material at chest height but wanted to keep that curved line). To the right is the new front piece, with above it the under collar. At far right is the collar and front edge facing and the back neck facing is that little C-shaped piece at the top.
This collar was drafted using the full instructions for a tailored shawl collar. And obviously, it was drafted on a much wider neck ring than before.

And this is the raglan sleeve version. I used the same collar pieces but completely re-designed the body around it. This variation has a very small back piece (which, unfortunately, refused to stay flat on the floor), a front piece which does extend under the arm and a huge one-piece raglan sleeve. Pattern makers among you will know that a traditional raglan sleeve for a woven fabric is normally cut in two pieces or has a shoulder dart. In this case, with the odd shape of the jacket and the tiny sliver of material at the front shoulder, I thought I could get away with some creative messing around. I turned it into this: A one-piece sleeve without shoulder shaping. We'll see how it works in the muslin.  


I had hoped to also finish the muslins today but, as so often, time was passing faster than I thought. At this moment, I really don't know which option I will prefer but both are fairly approximations of the design in the photograph. 

November 24, 2015

Not... quite...

Obviously, I should have made a toile. Such an unusual shape, randomly drawn with just some reference to the sloper... No guarantees of success. At all.

But I had more fabric than I needed anyway and it was cheap. As cheap as anything I might use as muslin. So, I just went for it. I cut both dress and jacket and just started sewing them.
The dress will need some serious tweaking too but that mostly comes down to taking in the hip curve. 

This is what the jacket looks like. It is not without some good points but on the whole... bleh. 

The main problem is the neckline. High and tight necklines are quite period correct for the 1950's but this garment shouldn't have one. And I've never been a big fan of that particular feature anyway. 

I may or may not have placed the button a bit too high. I'm not sure but I really think it is above the bust point on the model as well. I may lower it a bit but I don't want to put it on the bust point. 
The real issue it the cut of the neckline itself. It should have been a LOT wider. And I should have drafted the real shawl collar after all. A fairly wide one with enough room in that outer edge to roll over gracefully. 

Then there are the sleeves. Although mine are wide they are nowhere near the statement of those in the original picture. I thought I couldn't really make them any wider with the kimono sleeve like curve under the arm. Now I look at the picture and see that there hardly is a curve there at all. There's a very short vertical bit and then there is the bottom of the sleeve. I can make that.

And then, there is the bodice itself. I had noticed the forward tilt of the sleeves in the picture and guessed it might be achieved by taking in on the front seams. I didn't really know how to draft for it right from the start though. 
Now, my jacket has clearly too much bulk at the front, at chest height but between my body and arm. Bulk which doesn't go away by pinning the overlap a bit tighter (that just causes pulling lines). I think I could take in the front bodice, which is looking too wide anyway. This would bring the sleeves in a bit and reduce bulk. I may have to add a little ease at the back to compensate (I am now sort of obsessed with center back ease because I know my upper back muscles are growing because of the climbing). And some part of the messy fit at the top will go away anyway with the wider neckline...

I think I have plenty of clues to try and alter the pattern. Or rather, make a new one using the old one as a starting point. And this time, I will make a toile.


It's just a shame I don't like wearing those tight necklines otherwise I would call this a wearable muslin. Especially because I already made a perfect bound buttonhole.


November 21, 2015

Case study

So the plan was to make a a fairly simple top, inspired by those vintage cardigans... And then I changed my mind.
Those two last two outfits I added to Thursday's post were just too tempting. Unusual, partly freeform, clearly 1950's but completely different. 

I'm going to make my version of this suit. I will use this sort of tweed-effect knit which I bought a lot of last year (and used here, here and here) which should make it a bit more comfortable than the original, woven, herringbone tweed. 

All I know about the original comes from the text printed next to the picture:

Black- and-white tweed sheath wearing one of the great new surprises -- a spiral wrap of jacket, its sleeves cut like a pair of charming little capes. This look -- with this degree of jeweling, pale furs, velvet hat -- for city afternoons that shade off, casually into evening. By Tarquin, of Rodier wool

I don't really have such occasions in my normal life, nor any of the accessories. That won't stop me from making this suit though.
Intriguing as the description is, It don't think it is making any sense at all about the construction of the jacket. A "spiral wrap"? Sleeves cut like "charming little capes"?
It's a bolero jacket with sleeves which look like raglan sleeves at the front. 

As usual, I am drafting my own pattern. But this time, I thought I would try and talk you through my considerations about the design.

First, I had a look at the visible seams: One side front seam in the dress, curved seams which form side seam and shoulder seam in the jacket. 

These lines (those the blue arrows point at), which seem to break up the jacket, are just folds. They are caused because the bottom edge of the jacket is closely fitted. They stay in place while the rest, which is much wider, moves about.

To avoid too much bulk and warmth at the chest and shoulders, I want to make the unseen upper part of the sheath dress from a thin black cotton jersey. The rest of it, a skirt and mid-riff piece will be made from the tweed-like knit. 
Based on that seam in the picture, I decided to make it a six panel skirt. The original may have been a princess seam sheath, and this will look like that. It will also work better in my fabric than darts. 
It should be a very fitted dress with some ease for walking added by flares at the back seams.

Of course, the real challenge is the jacket. I'm pretty sure it is completely symmetric and that collar is so randomly folded that I'm sure it is just a simple, straight piece of fabric, turned over, not a carefully tailored shawl-collar. 

To make sense of the jacket, I studied the grainlines. The original fabric is a large-scale herringbone tweed so the grainlines are pretty easy to see, even in the picture. 

These blue lines follow the straight grain in several parts of the jacket. 
It looks like the edge of the collar is on the straight grain line, with the bottom front of the jacket at a 90 degree angle. The sleeves meet the front pieces at an angle. That suggests they are not raglan sleeves. You would normally cut those with the straight grain along the center line of the sleeve. These sleeves are almost at a straight angle to that. I think the sleeves are, in their entirety, cut on the back of the jacket. That would put the front sleeves at such an angle.

I started to draft the jacket using my kimono sleeve sloper but It pretty much drew it free-hand based on those observations. It's an experiment and that's fine. 

November 19, 2015

Brainstorming for winter wear

As usual, I had a long list of things I wanted to make this winter. Most of them pretty dresses. And some suits.
But of course, there are always practical considerations. And then, there is the issue of the expanding shoulder muscles...
And I still try to come up with sewing projects which can be made from stash fabrics, and not all the plans fit with that. 

Somehow, it seems like I need more tops again. Some nice ones, with a bit of vintage flair. And preferably some room growing room at the upper back. 

I have turned to Pinterest for inspiration. A couple of months ago, the site added the option to follow subjects. That made it really ease to find new images I like without spending a lot of time there. So, even though I haven't uploaded any pictures from my own vintage magazines for months, my amount pins has grown a lot (collected mainly on this board). 
And it's easy to find nice ideas there:

Maybe a simple fitted cardigan? Of course, the right colour is really important here...


These hip-length options are pretty great too (although this last one, by Jacques Fath in 1952, actually has a fur dickey I don't really care for) 


And then there are all those beautiful hyper-tailored 1950's jackets which might be made in knit to make them more comfortable. 


And the styles with blouse-y back panels might be very useful for me right now.

And of course, there are so many gorgeous, sleek unusual styles to aspire to...


November 16, 2015

Climb on, climb up!

With this top, I really wanted to wait with blogging about it until I had a proper picture...

Unfortunately for that, we were focussing more on bouldering than on taking pictures yesterday (I had a lot of fun doing that though). This picture shows my me-made sports clothes in action but it was taken in the corner of the climbing hall where the light is worst and we didn't take pictures anywhere else.

Last week, I started by making a plain and simple top with the back design I talked about before: Bra-style adjustable straps instead of the usual Y-back. I used fold-over elastic for the top edges and bra-straps, rings and washers for the straps. It fit properly but was a bit plain and, to make it possible to wear it without a sports bra, it would be nice to line the bust part. 

So, I sketched some colour block options and decided it would be great to make a climbing top with an arrow pointing up on the back panel. I kind of adjusted the rest of the design to that. 
The blue-ish material is a fairly plush sportswear material, the burgundy red is a fairly beefy lycra. Because the blue stuff is a bit thicker, I decided it might be fine in a single layer, even at the bust (although with a design like this, I could line it or even include bits of lingerie foam sewn to the lining). 

For the binding, I used strips of the red fabric. I cut them 10% shorter than the length they had to fit and serged them on, stretching to fit. Then I turned the strips over to the inside, zigzagged through all the layers and then trimmed away the excess fabric. 
I didn't have any matching lingerie elastic so I just made the straps from tubes of fabric. They are a bit softer than elastic straps and I just made them to fit. If I need longer straps in a couple of months, I'll just have to change them out for new ones. 

Based on my thorough testing so far, I have to say this top works well. It neither sags down nor creeps up and the materials are actually more comfortable than I had expected. I might try and make the arrow design a bit more obvious next time though, it doesn't really show the way it is now. 
There is more to try out, but this is a good start. 

November 12, 2015

History of fashion

This is a little bit off topic but not even that far...

I don't just follow fashion- and sewing blogs but also a couple of history ones. On the (excellent) History Blog, I found a post today which will interest many of you. 

It's about a book made by a 16th century accountant with a flair for fashion and it records his outfits over his lifetime is lovely coloured images like this one. 
And there is a video about the recreation of one of the outfits. 
I won't go into all the details here because every thing I now know about it comes from this article, so if you find this as cool as I do, you'd better go and read that ;)

November 9, 2015

Top issues

At the moment, I'm sort of trying to re-invent my sports-top. 
For indoor climbing, you don't really need special clothes. And you see climbers wear lots of different things, usually at some point between normal casual clothes, sportswear and outdoor stuff. I'm usually at the sportswear end of the spectrum (preferably no leggings though). 
So far, I have made two pairs of trousers for climbing and two cardigan/jacket-things. With those, I normally wear a normal vest top over a sports bra. However, those tops are fairly old and they are getting worn out and with those (RTW) sports bras, I have begun to notice something. Something which makes me re-think what I will make as sporty tops in the future

You see, as a climber, you develop the muscles in your upper body (and legs and core, but those are less relevant for this) and more so at the back than at the front. And stronger muscles get bulkier.
I can already notice that my sports bras have started pulling just a bit at center back. On a much more experienced and much stronger climbing friend, that pulling is so bad it is actually painful.
And it is really hard to find tops which won't have that effect.

The reason is simple:

This is the generic shape of a sport top (and most sport bras), both in ready-to-wear and in sewing patterns. You sometimes so some design changes but most of those are not actually functional. As far as fit and function are concerned, they stay true to the racerback shape. That shape allows for great freedom of movement, it makes it impossible for the shoulder-straps to slide off and it also does a great job at holding the garment close to the body so it can support the wearer's bust. All good things but to do that, it has one shape and one size. If the wearer does a sport which develops the muscles at the back and shoulders, that trusty top doesn't fit so well anymore. 
By the way, I would be interested to know if this is an issue which is specific to those of us who are climbing and bouldering, or whether it happens to everyone who does any sport which causes muscle development in the upper body. 

The first possible fix I am working on now is this:

I will basically replace the cut-and-sew racerback with bra-style straps which can be adjusted with sliders. The set-up is very similar to what I use for my racerback bras (which are still very comfortable). A shape like this might offer less bust support but, with my cup size, I'm not really worried about that. 

Another option might be to go with the same shape you often see for normal vest tops (like the ones I have been climbing in so far).

Those straps sit a bit further away from the neck and most of the material across the back is just stretchy fabric, not the more solid elasticated edges. I'll have to try it out but based on my (rather limited) experience so far, it might work. 

I am already working on the first top and I plan to try it out this week. I'll make sure to report back about it here ;)

November 3, 2015

Bows and ribbons

or shoe-repair... It both doesn't really sound like my kind of thing, does it? 
And yet, I just "repaired" a pair of shoes using a ribbon.

You see, when I came home of Saturday afternoon, my shoes looked like this:

The right shoe had lost its suede bow. It must have happened while I was walking around in town but I had not noticed. Of course, it's a shame because although I've had these shoes for a couple of years, they are still good. And obviously, I am not the kind of person who wants to throw out a perfectly good item just because a piece of decoration has fallen off.

So, on Monday, I looked for, and found some ribbon in a colour which matches the shoes. In fact, I bought two kinds of ribbon, the other one matching the darker trim. When I started playing around with the shoes and ribbon though, I quickly decided to go with just the taupe colour.


I folded pieces of ribbon into a double bow and sewed down its center line. Then, I folded the bow in the middle and stitched the folds. And then, I tried to sew it under the now-empty loop of ribbon on the right shoe. When I tried it, that whole bit of ribbon came out so I just trimmed it down to a more convenient length, sewed the join to the back of my bow and then tacked the whole thing on the remaining ribbon bow on the shoe. With the left shoe, I had to pull out the original bow first. With it gone, it became clear that the ribbons on the shoes were not that symmetric. I didn't want to try and change that. Those ribbons were partially glued on and had bits of machine sewing holding them in place as well (I had noticed that before, it was a big reason why I didn't try to remove the trim altogether after I lost that bow). 
Of course, I'm absolutely no expert at decorating shoes but I think this little repair job turned out well:

At least they now match again. I just hope the ribbon won't react too badly to the occasional drop of rain...

November 1, 2015

Are these trousers?

I've made new jeans! Remember that 1.10 meter piece of denim which I wanted to sew from? 

Well, I got a lot of nice suggestions and I thought about it for a bit longer. I even started to draft those 1970's style flares, only to realize that I really need more fabric for a style like that. 
And then, I had another look at the past summer's fashionable culotte styles... And noticed that the jeans ones had more fitted, trouser-like shapes that those in more drape-y fabrics. Shapes that would work for this amount of fabric.

So, I made these. As a pattern maker, I would say these are not culottes. I drafted them based on my trouser block so I don't really think so. It is also fairly fitted at the hip and crotch unlike a traditional culotte draft.

I considered using my loose fitting trouser block with the slightly lowered crotch (which I used for my retro jeans) but this fabric is fairly thick and heavy so I went with the normal sloper instead. 

The pattern is fairly simple. It has classic jeans details at the top: Back yoke,  scoop pockets at the front, patch pockets at the back. The legs reach to 24 cm below the knee and they are completely straight from the hip down.

I just managed to cut all the pieces from those 1.10 m of fabric. With only very small strips of fabric left over, there was not enough for a fly shield. So, I cut that from red cotton instead. It is thin cotton so I interfaced it with fusible cotton. 


To make that bit of red make sense, I decided to use the red cotton for all the unseen little details: Pocket bags, the binding on the waistband facing and the hem facing. 

I'm really happy with these jeans. They're fun to wear. Today, it was still fairly warm but I can also see myself wearing these with boots and a jacket in the coming winter.