Showing posts with label jacket. Show all posts

December 5, 2015

Result!

It is done! My dress/suit is finished. I have, once again, sort-of copied a photograph of a gorgeous 1950's outfit. 
I've done that a couple of times now. I don't really know when I started it. It's not like I don't have ideas of my own... Maybe it is just one of the lures of pattern making: It's so easy to follow the observation "that is pretty" with "I could make that". Of course, really making it isn't always as easy.


In this case, the jacket was a bit of a struggle. I agree with everyone who said that it was likely a one-piece pattern which should be draped to get that interesting shape. However, I only have one of those standard, adjustable dummies which does not really have my shape. And, most importantly, it hardly has shoulders (that is fairly common among dressmakers dummies and I consider it a big issue). I also don't have a human body double or a greatly talented draper at my disposal. So, I couldn't try draping. Flat pattern making was the only way.
After my "toiles" post, I actually made another raglan version with a two piece sleeve which curved forward a bit. Although it went some way towards getting that forward slump, it didn't really do the trick. In the end, I thought it edged towards being over-engineered.
So, I went with the half-kimono sleeve version.


I didn't use interfacing in the sleeve hems. I agree with those of you who mentioned some serious reinforcement would be need to make them stand out like that but I want to be able to wear this in real life, not just have it as a show piece. 

The dress was much simpler. I made a skirt with six gores, slightly tapered at the front and side seams, flared from mid-thigh at the back seams. This also allowed me to put some real waist shaping in the dress, something you often loose a bit in patterns for knit fabrics. 
To avoid bulk, I made the bodice from some fairly thin viscose jersey and finished its edges with fold-over elastic (used with the matte side out). 

To keep and enhance the before mentioned waist shaping, I put a short invisible zipper in the side seam at waist level and made an inner waistband.

That waistband is just a piece of soft elastic which closes with a lingerie hook-and-eye at the same place as the zipper (the left side seam). I determined its length by measuring the waistline on the pattern pieces and tacked it in place on each of the vertical seams. The effect is subtle but it works. And, to my surprise, it isn't uncomfortable. It is probably not recommended if you have a lot of soft flesh around the waist though. 

I'm glad I kept going with this pattern. It may not have all the sculptural beauty of the original, I still think it captures some of that charm. And comfortably so. Who would have thought? 

November 30, 2015

Toiles!

Right until the moment I started to take pictures for this blog post, I thought I had an easy answer.
Yesterday, before I went to the climbing hall, I sewed up very simple toiles of both of those patterns. A quick try-on showed me that on the half kimono-sleeve one, my alterations had worked. The raglan one had a nice clean fit under the arm but a weird bulge in front of each shoulder, a to-be-expected consequence of that trick I used on the sleeve so I wouldn't have a dart in the sleeve. 
The outcome seemed clear: Just make the half-kimono-sleeve one, the best one overall.

And then, I tried both on again today... A bit more carefully... (oh, and don't pay attention to the odd seam on the collar. I only made the under collar for the toile because it is quicker and the facing does not actually change the shape) 

This is the half-kimono-sleeve jacket:


The shape works but that big sleeve gives quite a bit of excess fabric under the arm. That is a normal result of this sleeve style so it can't really be removed. Not without seriously compromising freedom of movement.
Oh, and I should lengthen the jacket at center back and adjust that bottom edge to be a nice smooth line.

And this is the raglan one: 


No bulging fabric under the arm here. The weirdly placed excess material in front of the shoulders is on the seam lines, so it is easy to take in. With that issue out of the way, this version starts to look really good.
It also needs some more length at center back and the front bodice should be taken in a bit at the bottom edge. 

With the adjusted raglan version, the only really difference seems to be in that forward tilt of those sleeves.
Of course, I am never going to get that sculpted effect in this very thin fabric. My real fabric is thicker and I don't mind using some light interfacing but I won't go all-out with horsehair and heavy tailoring. 
But the shape is clear: Those sleeves curve forward and the hem looks shortest at the front. I can adjust the hem of my sleeve any way I like but that curve is a bit more difficult. I might take in the front seams (on either version) a bit. That would help a bit. The original may have the seam in an unusual place, more to the front (or have an extra seam) in order to get that shape. With my softer and slightly stretchy fabric, I don't think I'll bother though.
Which one to choose?

November 28, 2015

Some pattern making

Today, I finally had a chance to work on that jacket pattern. In your comments to my previous post, some people asked about the pattern so I thought I would show it to you.

When working on the alterations I had described, I also kept thinking about making a real raglan sleeve version. That might make the acute angle between the lower edge and the bottom of the sleeve a bit more natural. I ended up drafting both. I will make a muslin of each and see which one I like best. 

This is the old pattern piece for the front (all pattern pieces are without seam allowances or anything like that). See that narrow, straight collar piece? That was my problem. I can't show you the old back-and-sleeve piece because I re-used it to make the new version.

This is the new half-kimono-sleeve version. I you look closely, you can even see where I added width to the sleeve. I also added so width to the bottom of the side seam to compensate for what I took away on the front pattern piece (where I needed to remove some material at chest height but wanted to keep that curved line). To the right is the new front piece, with above it the under collar. At far right is the collar and front edge facing and the back neck facing is that little C-shaped piece at the top.
This collar was drafted using the full instructions for a tailored shawl collar. And obviously, it was drafted on a much wider neck ring than before.

And this is the raglan sleeve version. I used the same collar pieces but completely re-designed the body around it. This variation has a very small back piece (which, unfortunately, refused to stay flat on the floor), a front piece which does extend under the arm and a huge one-piece raglan sleeve. Pattern makers among you will know that a traditional raglan sleeve for a woven fabric is normally cut in two pieces or has a shoulder dart. In this case, with the odd shape of the jacket and the tiny sliver of material at the front shoulder, I thought I could get away with some creative messing around. I turned it into this: A one-piece sleeve without shoulder shaping. We'll see how it works in the muslin.  


I had hoped to also finish the muslins today but, as so often, time was passing faster than I thought. At this moment, I really don't know which option I will prefer but both are fairly approximations of the design in the photograph. 

November 24, 2015

Not... quite...

Obviously, I should have made a toile. Such an unusual shape, randomly drawn with just some reference to the sloper... No guarantees of success. At all.

But I had more fabric than I needed anyway and it was cheap. As cheap as anything I might use as muslin. So, I just went for it. I cut both dress and jacket and just started sewing them.
The dress will need some serious tweaking too but that mostly comes down to taking in the hip curve. 

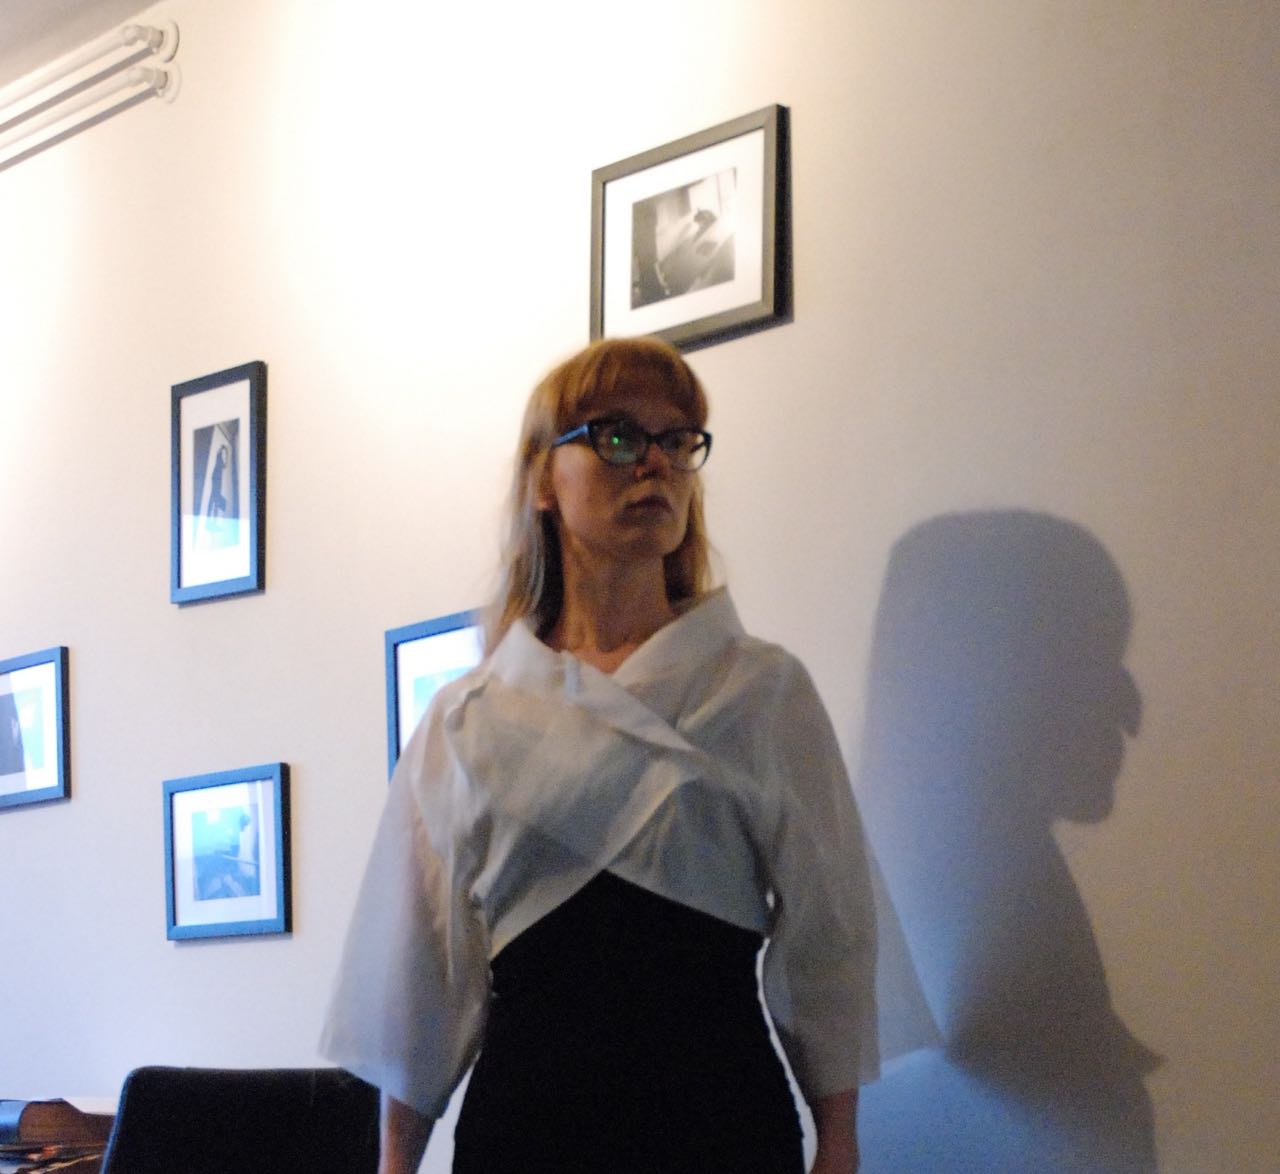
This is what the jacket looks like. It is not without some good points but on the whole... bleh. 

The main problem is the neckline. High and tight necklines are quite period correct for the 1950's but this garment shouldn't have one. And I've never been a big fan of that particular feature anyway. 

I may or may not have placed the button a bit too high. I'm not sure but I really think it is above the bust point on the model as well. I may lower it a bit but I don't want to put it on the bust point. 
The real issue it the cut of the neckline itself. It should have been a LOT wider. And I should have drafted the real shawl collar after all. A fairly wide one with enough room in that outer edge to roll over gracefully. 

Then there are the sleeves. Although mine are wide they are nowhere near the statement of those in the original picture. I thought I couldn't really make them any wider with the kimono sleeve like curve under the arm. Now I look at the picture and see that there hardly is a curve there at all. There's a very short vertical bit and then there is the bottom of the sleeve. I can make that.

And then, there is the bodice itself. I had noticed the forward tilt of the sleeves in the picture and guessed it might be achieved by taking in on the front seams. I didn't really know how to draft for it right from the start though. 
Now, my jacket has clearly too much bulk at the front, at chest height but between my body and arm. Bulk which doesn't go away by pinning the overlap a bit tighter (that just causes pulling lines). I think I could take in the front bodice, which is looking too wide anyway. This would bring the sleeves in a bit and reduce bulk. I may have to add a little ease at the back to compensate (I am now sort of obsessed with center back ease because I know my upper back muscles are growing because of the climbing). And some part of the messy fit at the top will go away anyway with the wider neckline...

I think I have plenty of clues to try and alter the pattern. Or rather, make a new one using the old one as a starting point. And this time, I will make a toile.


It's just a shame I don't like wearing those tight necklines otherwise I would call this a wearable muslin. Especially because I already made a perfect bound buttonhole.


April 16, 2015

Jacket sleeves

If you follow this blog on Facebook, you may have seen this picture already: 

There has been quite a bit of progress on my new jacket! 
Since then, I've made a lining and now I just have to attach that, make buttonholes and do all those little bits of finishing which always take way more time than you'd expect. And I think it is looking good! The skirt should be quite simple: A half circle should do the trick. I'll just have to give it some serious time to hang out before hemming. This fabric is shifty on its own (which is why I block-fused the entire jacket using a very thin knit interfacing)...

This time, I thought I'd be clever and have a bit of a chat about the pattern before showing off the finished garment (because that often leads to questions about the pattern). 

As mentioned before, my inspiration was this picture. 
The darted lower bodice is pretty standard. You will find a shape like that in many patterns and, when drafting your own, you take it straight from the sloper. The notched collar is hardly unique either. I did a full-on jacket collar draft because I like that but you could probably get a result like in the drawing with a simple convertible collar as well. 
The stand-out feature of this design is the yoke. With the sleeves and pocket flaps grown on. I love unusual takes on fairly standard shapes, which is exactly what this is. 

At first, I thought it would be easy to draft this using my kimono sleeved block (I've made that based on the normal sloper, to speed up the drafting process for dresses with kimono sleeves. It's for a fairly fitted kimono sleeve with an underarm gusset). As soon as I got started, though, I found a problem. Proportions.
In the drawing, the lower bodice is long and lean and it is 'crowned' with that nice yoke and pocket flap arrangement. The pocket flaps look like they are right at the apex of the bust and the yoke seam is a straight line. On the kimono sleeved block, that isn't possible. A straight line at or just above bust level would end up in the sleeve. And I thought a curve would be rather noticeable.

Instead, I went for a different option, constructing the yoke-and-sleeve more or less like a raglan sleeve. So, I took the upper bodice pieces from the standard sloper and grafted those only the normal sleeve. To keep that rather soft, flat shoulder line, I put them on a bit under the sleeve head (never recommended in  pattern making instructions but I know my slopers and the result I want). 
With this drafting choice, several practical considerations came together: To make a sleeve like this properly, you need to preserve the lower part of the armscye. To achieve that and get the bust seam at the right height, I lowered the armscye by 2 or 3 centimeters. That should also help to get the looser look around the upper arms and improve the room for movement when combined with a small alteration on the sleeve. That particular sleeve treatment is something I explained in this post.
With the yoke-and-sleeve done, I studied the picture carefully for the placement of the pocket flap. To keep it from making the sewing more difficult, I just used a 1 cm seam allowance for the flap (the flap curled up when I took the picture).

I've tried the jacket on and the sleeves actually still look pretty slim but I can move properly. The proportions on the body look fine so I guess I should put the difference in the sleeve shape down to the inevitable issues you get when converting a drawing into an actual garment. 

Putting the ease for movement in the sleeves was not uncommon in 1950's suits though. These images come from the French Elle magazine, the collection special for autumn/winter 1953. 


These suits are quite different in style from the one I'm making but both have very fitted bodices and fairly full sleeves. It's a very clever feature really. Not only does it set off that super-slim bodice, it also means the wearer can still use her arms. I won't look quite so wasp waisted in my suit (not without a corset... although these model might be wearing some rather hard-core underpinnings themselves) but that is kind of the effect I am going for myself.

October 1, 2014

Highest recommendation

This one goes out to the lovely people from the Claymore Guesthouse in Pitlochry. We stayed there for one night towards the end of our holiday in Scotland. It was a very nice place to stay, in a pretty town, in a very beautiful area so it was a bit of a pity we couldn't spend more time there. 
However, when we left, I made the mistake of not checking the wardrobe. Where I had hung my lovely tweed jacket...
I didn't find out about it until we were unpacking in Edinburgh, late that afternoon. I called the Claymore Guesthouse and they had already found my jacket. They offered to send it my home address, in the Netherlands!
Needless to say, I was very grateful. I think this goes above and beyond the service you would expect from a hotel or guesthouse.


Today, the package with my jacket arrived and I'm really happy to have it back. This was one of my very first successful more complicated self-drafted garments. It pre-dates this blog by a few months, this picture (which is on my Burdastyle page) is from January 2009! I haven't worn it that much because it's a bit too warm to wear indoors and its double breasted relative made a better option as a light coat (especially when cycling). I've always loved it though and really enjoyed wearing it in Scotland. In fact, I was looking forward to wearing it a lot more this coming winter...
And now, I can and will.
The Claymore Guesthouse was already on my list of places we'd like to stay again on our next trip to Scotland, and now, of course, it tops that little list. 


July 13, 2014

His new jacket

E's jacket is finished! And I'll mention it straight away: I ended up going against the advice of the majority of you when it came to the buttons.
I had asked E about buttons before I realized I had both options in stash. When I found them, he wasn't at home. I blogged about the buttons and showed them to him later. When he saw both options, he picked the silver buttons straight away. And because he will be the one wearing the jacket, his vote is the most important. So, silver buttons it is.

I thought it would be nice to take pictures on the little balcony at the street side of our apartment. It is, but unfortunately, the contrast with the (overcast) sky meant that it became really difficult to show any of the details of the dark coloured jacket. 

Fortunately, I showed you the back and the pockets earlier.

I am really happy with the fit at the neckline, shoulder and armscye. I finally found the reason for the issues I've had there before: Not only does E have a much larger neck circumference than 'average' for his size (I've known about that since before I started sewing for him and I've always tried my best to accommodate for that), the big muscles in his shoulders also mean that those shoulders are sloping down a bit. Which caused fit issues in his earlier summer jackets. 

All in all, I think it suits him and I hope he will enjoy wearing this jacket.

July 11, 2014

Buttons...

That jacket for E is almost done. All that remains to be done are hems, buttons and buttonholes.
Which brings me to the question: What kind of buttons?
I asked E what he wanted but, typically, he told me to do what I thought best because, and I quote: "You know about fashion".

These are the options available (both from my stash):

Simple black buttons. The exact same black buttons as I used for his old jacket and for the trousers I made him in this fabric. Un-obstrusive and there's nothing wrong with them.
However, those silver coloured zippers at the top pockets also suggest another option:

Silver coloured buttons. These draw a lot more attention to themselves and increase the uniform-like look of the jacket. They might be a bit much. But it would make the new jacket a bit more different from the old ones, it's not a strange look in menswear at all and might be kind of cool...

I took these pictures to help myself decide and then I realized that with them, I could ask for a second, third etc. opinion... Yours. So what do you think: Black buttons or silver ones?

July 9, 2014

His pockets

So, I'm finally really sewing again: making that jacket for E. It was about time too, the fabric of his old jackets is pretty much worn out (those were both made from a cotton twill which, in retrospect wasn't such good quality).
I stuck with the design idea I had earlier.

This is my sketch. Pockets at the front, convertible collar, fitted back with a pleat. Vaguely inspired by those 1930's and 1940's sporty men's blazers.

Last weekend, I worked on the pattern. I started out with the casual jacket sloper which I have used for most of E's coats and jackets. I think the thicker wool coats I made from it were great but it was always a bit baggy for a thin summer jacket. This time, I wanted to make it a bit more fitted and yet still give E enough room to move. It should be a jacket he can wear every day.

I'm using the same cotton/linen blend I used for my jumpsuit and I decided not to line this jacket (which kind of means I'll have to make one for in-between weather later on). Because it's going to be unlined, I'm taking care about a neat finish on the inside. I make flat-felled seams wherever possible and use bias tape for seam binding everywhere else. 

This is the back of jacket. Outside...

and in. You clearly can see the wide pleat at center back.
And I don't normally do this, but on this jacket, I've topstitched all the folds in each pleat.

You can see it here, in the bottom pockets. It should keep them from getting too much out of shape.

And I thought I would share the construction of those bottom pockets in a bit more detail.
It's basically a cross between a regular patch pocket and a cargo pocket but less work than the latter.

You start out normally: Finish the top of the pocket and press in the sides. My pockets have pleats in the middle, both for looks and to allow them to expand a bit width-wise.

The position of the finished pocket should be marked on the wrong side of the front piece. 

Put pins through the bottom corners to make them visible on the right side and position the bottom edge of the pocket between them.

Pin down and stitch.

Put pins through the marks for the top corners and turn the pocket up, positioning the top corners at the pins.
You should now have some excess length in the pocket (for this type of pocket, you need the pocket pieces to be about 3 cm longer than for a patch pocket).

Pin the pocket sides from the top down.

When you almost reach seam allowance at the bottom, fold the excess fabric harmonica-like.

Stitch the sides.

And there is the pocket. Just a bit more three-dimensional and spacious than a patch pocket without being much more work.  

At the moment, I really enjoy making this jacket. I may be able to finish it tomorrow and I hope I can persuade E to model it in the weekend.