Fitted bodices can really limit your range of movement. Of course, that can be down to a fitting issue but not necessarily. Some styles are just inherently restrictive (just ask anyone in a tailored jacket to hold out his/her arms out to the side at a right angle to the body). Perfect, individualized fitting can make the most of any style but that is a difficult job (one I should try and tackle once I'm fairly certain my shoulders will stay the same shape for a while).
Styles which allow for a great range of movement are traditionally wider and more casual in look. I say traditionally because a lot of that job is done nowadays by elastane.
The pattern adjustment I used for my dress and jumpsuit is intended for fabrics without stretch. In fact, it is kind of like the "action back" on some casual jackets (for men as well as for women) from the 1940's. The adjustment adds room for movement but confines it in the general, fitted shape of the design.
It is easy to make using a sloper or a tried-and-tested pattern for a fitted bodice with sleeves (as ever, my drawings are not to scale)
Your pattern will need a waist seam to make this adjustment possible. If your sloper doesn't have a waist seam, just cut it at the waistline.
Draw a line for the back yoke. My sloper has fairly long shoulder darts so my line crosses the shoulder dart. The line should be between a third and half the height of the arm scye when measured from the top.
Trace the yoke pieces fit them together. Here you can see that my drawing isn't very good. There shouldn't be a big dent in the shoulder line (there will probably be a small one. If there is, just keep it).
Clean up the shape of the yoke. It will end up with a slightly curved bottom edge.
Draw lines from the tops of the waist darts (or dart, if the pattern you are using has only one) to the bottom of the shoulder dart. If you had a shorter shoulder dart, draw the lines to the point on the yoke line under were it ends.
Cut the lines and close the darts. This will transfer all the width from the darts to that one point on the yoke.
Mark the edges of the pleat.
Add seam allowance to the pattern pieces if you like. Both pieces should be cut with center back on the fold.
Fold the pleats closed before sewing the lower bodice to the yoke.
I usually cut the yoke piece twice. I use one as a lining and sew the yoke seam and shoulder seams so that all seam allowances will be encased between outside and lining.
Showing posts with label tutorial. Show all posts
June 3, 2020
May 5, 2020
Sew your own 1950's t-shirt
So, you've made your pattern, now you can start cutting and sewing.
You can basically use any kind of knit fabric for this pattern although I wouldn't recommend really flimsy, very stretchy kinds of jersey. Because this pattern actually has ease, you can use those odd knits which hardly stretch at all (you can sometimes find those on the bargain table of your fabric store...). When I use a fabric like that, I cut the top a bit wider by adding 1 cm between the fold of the fabric and center back/front.
When cutting, center back and center front should obviously be placed on the fold. The straight grain line on the sleeve is that vertical help line you drew. And I don't think I have to tell anyone that you can fold your fabric differently than just in half if that makes cutting more economical... Just make sure the folds are straight, preserving the straight grain (which is not really the right term in a knit, but you know what I mean.
Now, the sewing starts. I usually use the serger straight away on a knit fabric but you could also use a stretch stitch on your sewing machine.
The first thing to sew is that neckline.
I've made this top with and without fusible interfacing in the neckline and my choice in the matter depends on the fabric. If it is likely to roll, interface. If not, you can do without. The interfacing gives the neckline a more defined edge, without is a bit softer. Both work well.
If you use interfacing, use quite a thin variety which is suitable for knits (this will still reduce the stretch by quite a bit so if you want to use it, make sure your neckline is big enough to let your head pass through without relying on stretch).
Finish the edges of the neckline facings.
Press the facings to the wrong sides of the bodice pieces.
Pin the shoulder lines, with the front facing in place.
Fold the back facing over the front facing and pin through all layers. Make sure to remove any pins under the facing.
Sew the shoulder seams, including those facings.
Turn right side out and press on the inside. Now you have shoulder seams and a neatly finished neckline.
Insert sleeves. Pay attention when pinning, there is a difference between front and back of the sleeve.
Sew side seams and arm seams in one go.
Hem bottom edge en sleeves.
Finished!
May 4, 2020
Make your own 1950's style t-shirt!
Do you like 1950's style cardigans, sweaters and the occasional t-shirt (those were not commonly used in ladies' wear yet)? Designs like this one?
Well, I do. Unfortunately, this is one of those styles which seems hard to translate to the present day. I have tried some original knitting patterns but the result was always disappointing. They are often a bit too short for me but what is worse, even if they're not, they won't sit well. The part from the waist down is usually knitted as a straight bit of rib knit. This means that although it will stretch over the high hip, it just creeps up.
And it seems like such a nice day-to-day style, you know, to be worn without all the period accurate shape wear...
So, I did what I usually do. I tried to make a pattern to get the result I wanted. I took a bit of experimentation but I ended up with something I really like (the dummy doesn't do them justice...). The first two were made in winter, I used a fairly warm knit and gave them a nice high turtle neck. When the weather got warmer, I tried thinner fabrics and a different neckline (and different sleeve length, of course). And that neckline became my absolute favorite.
If you have a tried-and-tested t-shirt pattern, making this pattern won't be difficult. However, it may require a bit of to get it exactly right for you. After all body proportions vary, as does posture and then we haven't even mentioned preferences.
I'll give you the pattern instructions in this post and I'll come back tomorrow with some extra information about fabric and construction.
Oh, and one more thing: my pattern pictures are not to scale. Proportions can be a bit off, in this case, they are on the sleeve. And unless I write otherwise, they are without seam or hem allowance.
All right. You should start with your tried-and-tested pattern. Preferably one with a marked waistline which is right for you and no darts. If yours has very straight bodice pieces, you may want to try your t-shirt on and check the fit at the waist, you might want to take the pattern in at the waistline to get a shape a bit like this.
Now, if you are trying on the t-shirt anyway, have a careful look at the neckline. Does it sit perfectly or does it pull back it bit? Slightly gaping at the back neck while it sits high against your throat? It that is the case, you will need to make an alteration or my high, straight neckline will quite uncomfortable.
Put the pieces together at the shoulder line and draw a new shoulder line, mine was 1.5 cm to the front. Move center front and back as well and draw the new neckline (don't worry about getting it perfect, it won't be used in the end result).
Separate the pieces again mark a point 2 cm outside the under arm point (the point on the bodice where the armscye meets the side seam. If your pattern has quite narrow sleeves which pull into the armpits a bit, you may also want to drop this point by 1 or 2 cm.
Also mark a point 1 cm above and 1.5 cm out from the shoulder point. Draw the new shoulder lines like the blue ones in the picture.
Draw a new armscye. It should not cross the old one.
Now, slash both pattern pieces at the waistline and open up by 3 cm. Draw your new side seam from the under arm point to the lower waistline.
Draw the bottom edge of the shirt. Mine is usually about 10 cm below the waistline but this is based on your preference. I also keep the bottom edge as straight as possible because I love to use fabrics with stripes for this design.
You can use the pattern like this if you prefer your usual neckline To get my favorite neckline, there is one more step:
Mark a point about half way on the shoulder line and draw a straight line from that point to center front and back. You want this line to be the same length on both front and back.
This neckline should be made with a cut-on facing. You make this by mirroring 4 cm over the line you just drew.
And now, you still need a sleeve pattern. The upper bodice is fairly loose fitting and so is the sleeve. This means you can get away with drafting a very easy pattern:
Draw a vertical line about as long as you want your sleeve to be. Square across at 9 cm below the top.
Measure the front and back armscye are draw diagonal lines from the top of the vertical line to the horizontal one with those measurements.
Draw in the sleeve head. At the front, it should cross the help line at about 1/3, at the back at about 1/2. Measure the sleeve head and remove any excess length at the edges.
Draw the side seams, you'll want these to be fairly tapered.
Your pattern is now finished. Add seam and hem allowances to your preference.
Well, I do. Unfortunately, this is one of those styles which seems hard to translate to the present day. I have tried some original knitting patterns but the result was always disappointing. They are often a bit too short for me but what is worse, even if they're not, they won't sit well. The part from the waist down is usually knitted as a straight bit of rib knit. This means that although it will stretch over the high hip, it just creeps up.
And it seems like such a nice day-to-day style, you know, to be worn without all the period accurate shape wear...
So, I did what I usually do. I tried to make a pattern to get the result I wanted. I took a bit of experimentation but I ended up with something I really like (the dummy doesn't do them justice...). The first two were made in winter, I used a fairly warm knit and gave them a nice high turtle neck. When the weather got warmer, I tried thinner fabrics and a different neckline (and different sleeve length, of course). And that neckline became my absolute favorite.
If you have a tried-and-tested t-shirt pattern, making this pattern won't be difficult. However, it may require a bit of to get it exactly right for you. After all body proportions vary, as does posture and then we haven't even mentioned preferences.
I'll give you the pattern instructions in this post and I'll come back tomorrow with some extra information about fabric and construction.
Oh, and one more thing: my pattern pictures are not to scale. Proportions can be a bit off, in this case, they are on the sleeve. And unless I write otherwise, they are without seam or hem allowance.
All right. You should start with your tried-and-tested pattern. Preferably one with a marked waistline which is right for you and no darts. If yours has very straight bodice pieces, you may want to try your t-shirt on and check the fit at the waist, you might want to take the pattern in at the waistline to get a shape a bit like this.
Now, if you are trying on the t-shirt anyway, have a careful look at the neckline. Does it sit perfectly or does it pull back it bit? Slightly gaping at the back neck while it sits high against your throat? It that is the case, you will need to make an alteration or my high, straight neckline will quite uncomfortable.
Separate the pieces again mark a point 2 cm outside the under arm point (the point on the bodice where the armscye meets the side seam. If your pattern has quite narrow sleeves which pull into the armpits a bit, you may also want to drop this point by 1 or 2 cm.
Also mark a point 1 cm above and 1.5 cm out from the shoulder point. Draw the new shoulder lines like the blue ones in the picture.
Draw a new armscye. It should not cross the old one.
Now, slash both pattern pieces at the waistline and open up by 3 cm. Draw your new side seam from the under arm point to the lower waistline.
Draw the bottom edge of the shirt. Mine is usually about 10 cm below the waistline but this is based on your preference. I also keep the bottom edge as straight as possible because I love to use fabrics with stripes for this design.
You can use the pattern like this if you prefer your usual neckline To get my favorite neckline, there is one more step:
Mark a point about half way on the shoulder line and draw a straight line from that point to center front and back. You want this line to be the same length on both front and back.
This neckline should be made with a cut-on facing. You make this by mirroring 4 cm over the line you just drew.
And now, you still need a sleeve pattern. The upper bodice is fairly loose fitting and so is the sleeve. This means you can get away with drafting a very easy pattern:
Draw a vertical line about as long as you want your sleeve to be. Square across at 9 cm below the top.
Measure the front and back armscye are draw diagonal lines from the top of the vertical line to the horizontal one with those measurements.
Draw in the sleeve head. At the front, it should cross the help line at about 1/3, at the back at about 1/2. Measure the sleeve head and remove any excess length at the edges.
Draw the side seams, you'll want these to be fairly tapered.
Your pattern is now finished. Add seam and hem allowances to your preference.
July 26, 2017
A little trick...
... with a facing and an invisible zipper.
I am finally making a dress from a lovely African wax print that I couldn't resist buying earlier this year. When I was about to attach the facing, I realized this would be a great time to show you a little trick I had to find out for myself.
It's about how to get a neat point where the top of the zipper and the neckline meet.
It is possible that this technique is explained in lots of books on sewing technique. Books which I never bothered to read in their entirety. If you did, and all this is old hat to you, please ignore the rest of this post.
I found out about this when I was still doing wedding dress alterations. At the first store where I worked, a lot of the dresses came with invisible zippers which sometimes broke (standard strapless wedding dresses usually contain too many layers of fabric and are pulled on too tight to make invisible zippers a good idea) and then had to be replaced.
Whenever I took out one of those broken zippers, I noticed how neat and tidy those top points were. And so square! For all my careful zipper insertion, those points always came out a bit rounded because so much material was meeting there.
Gradually, I came to understand that the secret was all about planning ahead and making the right folds and the right stitches at the right time.
This is how it is done (works for facings and linings):
Press back the center back seam allowances before you even start pinning the facing to the neckline. On the outside, you already attached the zipper so that pressed line is already there. Press a little more back on the facing (assuming both pattern pieces were the same width). Pin the neckline an stitch, STOPPING at the pressed line on the facing.
Press the neckline seam allowances. Clip them where necessary and press them first open and then to the wrong side of the garment.
At the edge of the zipper, on both outside and facing, fold the neckline seam allowance down first and then fold the center back seam allowance over it.
This gives you edges without bits of seam allowance poking out along the center back. At this point, you could hand-stitch the facing to the zipper tape. I've done that for years. But you can do it by machine without messing up that nice corner.
Flip the whole thing inside out again and pin the pressed line on the facing to the zipper tape (make sure that fold arrangement at the top stays as it is).
At the other side, on the wrong side of the outside fabric, this should give you a little fold of excess fabric. That is what you want, it is the fabric which will cover the zipper teeth on the outside of the garment. Stitch where you pinned, stopping at the neckline stitching. It doesn't really matter whether or not you sew down the neckline seam allowance on the facing but leave the outside neckline seam allowance.
Turn right side out again. You make have to pull and push a bit to get all the layers back where they belong but when you have done that, this is the result!
I'm really glad I learned this trick and I hope it will be useful to some of you as well.
March 4, 2017
Skirt tutorial!
When I posted some pictures of my blue skirt on the We Sew Retro Facebook group, some commenters asked about the pattern...
I usually mention that my clothes are self-drafted but I forgot to add that this time. Of course, like all full skirts, half-circle skirts are easy to draft. And splitting the skirt pattern into gores and adding a pocket aren't exactly rocket science either.
The starting point for this skirt is simple (and very similar to drafting a circle skirt). You only need one measurement: the waist (with any ease you may want added to it. If you want your skirt to sit below the natural waist, use the measurement of that point on your body. Just keep in mind that a straight waistband might not work so well in that case).
To find the radius of your half circle, use this formula: (waist measurement x 2): 6.28
It's the formula you use to calculate a circle skirt, times two. Use this number to draw the waistline of your skirt.
Measure from the waistline down to determine the length of the skirt
If, like me, you have used the corner of a piece of paper as your starting point, you now have a pattern which will give you a custom-sized half circle skirt if you cut it on the fold and add seam allowance at the open edge.
I usually don't cut skirts like this in one piece, it's not very economical. I normally split the pattern in half and cut one half on the fold and the other half in the other direction along the selvedge (which gives me a skirt with sides seams and a center back seam).
Using this fabric, I had the nap to think of though (and piecing skirts which are segments of circles changes the grainline which influences the drape of the skirt) so I halved those to pieces again.
Four pattern pieces, for a skirt made up of eight gores.
And then, there is the pocket. Adding pockets to a gored skirt is simple: Just take one of the gores (which now becomes the side front) and draw a line where you want the top of the pocket to be. I like to place it at an angle. Also determine how deep you want the pocket to be and draw its bottom edge.
To make the fold-back flap, first draw it in where you want it to be in the finished product (the blue lines). Then, mirror it over the pocket top edge.
If you have done this, you just have to cut the pieces correctly: You should end up with a top piece/back of the pocket (top of the gore, down to the bottom edge of the inside of the pocket, to be cut from your fashion fabric), a bottom piece with flap (lower part of the skirt with what will become the underside of the pocket flap, fashion fabric) and a piece for the inside of the pocket and the flap (I usually split this piece. I cut the flap and a little bit more from the fashion fabric and interface that. The rest of the inside of the pocket is cut from a lining material)
When sewing the skirt, you will have to decide whether or not you want to sew the flap into the seams (I did this on the front seams). In that case, you only have to sew the bottom edges of the flaps. If you want free-hanging corners, you also have to sew to side. Sew it to the exact point where the flap ends and clip the seam allowances to that point. That will allow you to turn the flap right-side-out while still having normal sides for your skirt seam.
And of course, you will need to finish the waistline. For a skirt which is worn at the natural waist, I like a straight waistband of about 4 cm high. If you want to wear the skirt lower, that might not work so well. In that case, you could also finish the top edge with a binding or make a shaped waistband.
I hope this description helps if you want to make a skirt like this. As usual, if you have any questions, just ask (just remember to give me a way to reply to you directly or you'll have to check the comments to this post regularly) and if you make something using this tutorial, I'd love to see the result!
October 2, 2016
Making jeans
Not too long ago, I read post on someone else's blog about jeans. It once again reminded me that I could use another pair myself. The post also contained a bit of a surprise for me: There was a picture of the insides of the finished jeans and none of the seam allowances had been finished in any way. There was topstitching along some seams but all the edges were raw.
Not a treatment I would ever recommend for denim. This, rather experienced, seamstress told me she had never had any trouble with the particular kind of high quality denim she uses.
And now, I am making jeans again. Another pair of my close-fitting jeans, using stretch denim. I'm making them using my normal method. I've done this for quite a while and generally don't give it a lot thought. However, based on that recent discussion I thought it might be worth showing after all.
I like to use flat-felled seams on my jeans. I use them on all those seams which you will usually see flat-felled or topstitched in RTW. Yoke seam, center back seam, inner leg seam.
Years ago, before I had a serger, I would sometimes try an flat-fell the outer leg seam as well as the inner leg seam but I would recommend that. It's really fiddly.
This is what I do now:
For my flat-felled seams, I use topstitching thread in sewing machine's needle and regular thread in the bobbin (topstitching thread is thick and likely to get stuck in the bobbin). This works really well but it does mean that you had to plan ahead where you want the contrast stitching to show.
The first step is to sew the seam with the wrong sides of the fabric facing each other and stitching on the side you want to be on top in the flat-felled seam.
This is what the other side looks like.
Then, I press the seam allowances open,
trim the seam allowance on the side that has the stitching in the regular thread
and fold and press the other seam allowance around and over the trimmed one.
You could pin it down at this stage but I usually don't. Denim can pressed really well and tends to stay in place just fine. In fact, I think having to remove pins might make your stitching more wobbly. Just stitch close to the folded edge, keeping an even distance to the first line of topstitching.
Maybe a bit tricky if you try this for the first time but not difficult. And you get nice, strong seams and a clean, smooth inside of the garment.
Years ago, I used a different method: I would first stitch the seam in the usual way, with the right sides facing and using regular thread. Then, I would press, trim and fold the seam allowances on the inside and then stitch along the folded edge. However, when using topstitching thread, I would have to stitch from the outside of the trouser leg, with those folded seam allowances on the inside. I made it work but that was really tricky and it involved much more re-threading of my sewing machine.
There is one area where I might try it again though: The center back seam.
Mine looks like this. I'm actually not that bothered by mismatched point but I know some people like to sew their jeans which real points.
And on the inside, that is just what I have. If I were to use my old method for flat-felled seams on the center back seam (and the regular method on the yoke seams) or even to make a fake flat-felled seam by serging and topstitching, I could have this perfect point on the outside.
I won't try and change it on this pair of jeans though.
Oh, and just in case you are wondering about the blue lines and the stamp on the wrong side of the fabric: This was the beginning of the bolt. I originally bought just enough for two pairs of jeans and this will be the second one. I had to be really careful with my pattern lay-out to squeeze it out of the remaining fabric so I was obviously not going to avoid those lines on the back.
October 27, 2015
Simple drape-neck top...
... not to be confused with other tutorials for tops with draped details which I have made in the past. This one is for the pattern for this top:
The pattern is easy to make based on a tried-and-tested t-shirt pattern and it's easy to sew as well. Easier that a proper cowl-neck even.
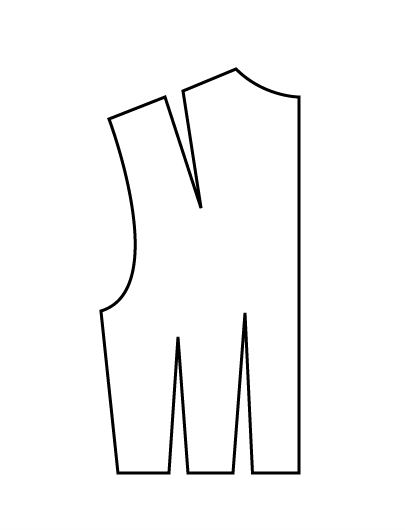
You start out, obviously, with the bodice pieces of your pattern. If your t-shirt block has bust darts, it can be easy in this case to rotate them to center front.
Draw in the new neckline. I made it about 2 cm wider at the neck (starting from a high, close fitting neckline) and made a long, narrow deep scoop to about 10 cm above the waistline. This goes through the bust point and should include any bust darts there may have been. Draw a new back neckline to match the front one at the shoulder seam. Only lower its point at the center back line as much as you need to make a nice curve (no more than about 0.5 to 1 cm).
Measure your new neckline and use the measurement to draft the drape piece. It's easiest to just draw a horizontal line first, in the middle of the paper, of the length you measured. Then, draw the center front and center back lines at 90 degrees from that line (only draw one side). Mine are 24 and 8 cm respectively. Draw a gentle curve between them as shown.
Now, measure along the curve and adjust the beginning and end of the piece so the curved line has the length required for the neckline of your top. Add seam allowance if you like, fold the paper along the horizontal line and cut the drape piece out through both layers. You should end up with a pattern piece which looks like the one in my drawing.
When cutting fabric, both the bodice pieces and the center front of the drape piece should be cut on the fold.
When sewing, start with the shoulder seams of the bodice pieces and the center back of the drape piece. Then, fold the drape piece double with the wrong sides facing each other and insert it into the neckline, treating it as one layer. Because the result drape neckline is smaller than the seam line, the stitching won't easily be exposed.
Of course, you can make lots of variations by changing the size and placement of that draped neckline. Or you could put the fullest part of the drape somewhere else than at center front. Or you could also insert a piece like a dickey into the neckline, keeping the top even more fitted and eliminating the need to wear something under it.
And although this is a design for jersey fabrics, there is no real reason why it couldn't be made in a woven. It would just require quite a bit more messing around with darts and you should cut the drape piece on the bias...
I hope you like this tutorial and everything is clear. Don't hesitate to ask questions, just make sure I can reach you to give an answer (if your blog or email address in your profile or comment, I'll use that. If it isn't, I can only answer here in the comments so make sure you check. Or email me instead, the address is at the top right of this page) And as usual, I'd love to see your results!
Subscribe to:
Posts (Atom)