May 14, 2015

Summer sewing plans

Some people who sew plan ahead. They start sewing for warmer weather at the same time the first summer clothes appear in stores. Of course, if you were building up a new wardrobe from scratch that would make sense. Otherwise, you would have nothing to wear by the time the weather changes. 
The reality of many of our lives is different: We have clothes to wear, we would just like to add different ones. We may need new things in some categories but usually not a whole wardrobe. 
As a result, I usually react slower. When the calendar says it's spring, I start thinking about what I could make for the coming season but I rarely take action until it actually gets warmer.

In this past week, it is turning summer-y outside. At the moment I'm working on a dress for which I started to draft the pattern before making the grey party dress. It looks promising so far but not particularly summery. 

As for wardrobe needs, I could do with another pair of wide-legged trousers in a fairly thin fabric and maybe a couple of simple tops.
And a simple dress in a jersey fabric. You know, the sort of thing that's nice to take with you when going on holiday. 

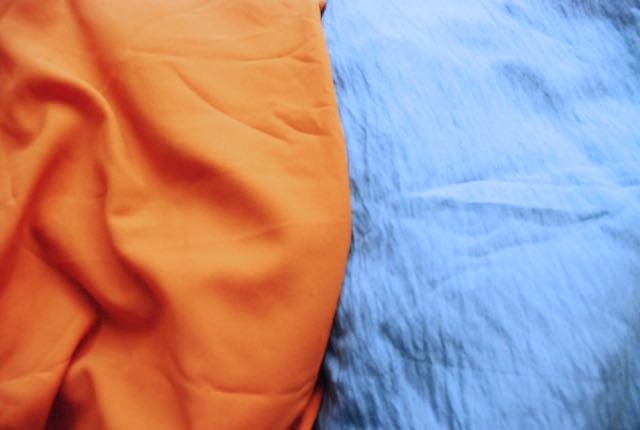
I have fabric for those things. The brightly coloured striped fabric on the right is a nice quality cotton jersey with lycra. It should be nice as a simple fitted dress. The other one is linen or something and doesn't have the same stretch and recovery. It's nice but better suited for looser shapes.

And then to the stuff I would like to make...


Of course, I still want to make this dress from orange and white striped cotton. I've wanted that one for at least a year now.


And something sort of like 1930's beach pyjama's in this sky-blue viscose.


It's always difficult to photograph plain fabrics well but I think I managed to get something close to the real colours here (maybe the picture is a bit too light). The orange is crepe. I think it would work well for a 1920's dress. If there's enough of it.


The dress which comes to mind is the one on the left in this picture. A light and airy design which seems perfect for warmer weather. And how cute is that capelet? I would just have to think about the contrast fabric...


And of course I still want to try out a draped and gathered 1940's design. This one from EvaDress is an option. Or one of two Vogue repro patterns I have. Or a real vintage one. 

Plenty of ideas which, as usual, may be subject to any number of changes of mind. I am looking forward to make at least some of these though.
Have you started sewing for summer yet? And what do you want to make?

May 12, 2015

Hats!

If you've just found my blog, welcome! I hope you won't be disappointed. Spectacular structured and draped dresses are part of my repertoire but most of the time, I make more ordinary things. 
Today, I thought I'd show you some hats I finished just before I started to work on the party dress (but I didn't get a chance to take pictures straight away).

There's the cut-and-sew fedora for which I took the pattern from a RTW hat. I had plenty of criticism on it in my earlier post but it looks really good in the picture. Better than in real life, I think.
It's definitely worth trying to make an improved version of this one.

Of course, you have already seen the hat I made to go with my suit. I just didn't include a close-up in that post, nor a clear picture of the back, which has the decoration. So here it is.

And then there's a hat you haven't seen yet. When I went to the haberdashery store to get some supplies for the first hat, I also found rolls of thick felt. Synthetic stuff but it still seemed rather suitable for hats. I bought some of it in a lovely bright turquoise colour and decided to use it for a 1920's cloche.

I used this design from Gracieuse magazine

The pattern looks like this. You were supposed to use something like wool jersey which some kind of millinery net to support the hat shape. I just used the felt, which is pretty thick, and didn't add the scarf. 
Making the crown from one piece with five points is very different to anything I've seen in more modern cloche patterns but it seems to have been the standard method according to Gracieuse in the 1920's. I've found three other examples which were constructed in the same way. 
I had to enlarge the whole thing by about 2 cm to make it fit my head.

Because the felt was so thick, I decided to cut the pieces without seam allowance and sew them edge to edge by hand. I tried to smooth the shape a bit more by steaming the seams with my iron but that didn't work. This isn't wool which can be shaped by heat and steam but a synthetic fiber. Ironing only made the felt softer so I stopped quickly.

I kind of like the result. It's a fun hat and, like all cloches, practical in that it can't be blown of your head quite so easily. It doesn't really look like a design that's about 90 years old though... but it really is. 

And that also makes it another entry for this year's Vintage Sewing Pattern Pledge. The third one. Or maybe the fourth. I'm not sure whether or not the first hat counts as well. That one was made from a pattern which I bought new several years ago and although all the hats in it have an obvious retro flair, Vogue doesn't call it a vintage style pattern (although this pattern may have been printed before vintage was very popular, I think I've had it for about 7 years). 
Either way, my progress this year is a lot faster than it was last year. A (pre-New Look) 1940's dress or another go at a 1930's design should be next.

May 9, 2015

Party dress revealed!

And here it is! The dress I've been working on and blogging about for a little over a week. Just to recap: We were invited to a friend's wedding but didn't know about it until a week and a half before the date because our invitation had got lost in the mail (we later found out that the same had happened to a two other guests as well). At that point, I decided to try and make an appropriate dress. A dress I have had in mind for a year or so. 

Obviously, I've taken these pictures after this particular garment met its destiny. I wore it yesterday to the wedding of our friends V and A. 
They got married at a casual restaurant in the dunes near the beach where they arrived side-by-side on horseback. Both bride and groom looked splendid in black and white. The weather was the best it has been in a week or so: the wind had calmed down and occasionally the sun came out. Most notably during the outdoor wedding ceremony, just after bride and groom had said 'I do' :)

So, before I took these pictures, the dress had already survived a car ride, sitting and standing, cake, drinks, dinner and crazy dancing... So I hope you can forgive a few creases (I tried to iron the skirt before taking pictures but sat on it again to put my shoes on). 


And today, the wind was back...

For this dress, I don't have to give technical details now. You can read all about those in my posts from the past week. 

I will repeat this: I've had the idea for something like this because I thought it would be great to combine all the different skills I've acquired over the years: Not just in sewing but also in pattern making, lingerie, corsetry and bridal wear. 

Which is why it had to be a strapless dress with bra-style underwired cups, covered with the kind of draped fabric often seen on bridal gowns with a skirt which has a Pattern Magic knot. 

A few things I didn't tell you yet: I used spiral steel boning in those boning channels. I had pre-tipped bones but some were too long, so I tried making tips from electrician's shrink wrap for the first time, which worked very well. 

To make sure I could get in and out of the dress on my own, I added a little trick I learned when altering wedding dresses. Those bits of elastic which stick out through the lining at waist level are connected to the structure layer inside. When you put the dress on, you close the lingerie hook-and-eye on the elastic strap first. This holds the dress in the right position and allows you to devote both hands and all your attention to zipping it up.

About that zipper... I went with a rather heavy metal one. There are a couple of reasons for this. First of all, I don't trust invisible zippers for closely fitted strapless bodices. I just don't think they can take the strain (I've come across one bridal wear brand which thought they could. I remember because I've had to replace a few of those zippers...). The obvious alternative would be a normal zipper. Preferably set in as a lapped zipper. But that tends to work badly with all those layers in the bodice. Often, the overlapping piece has a tendency to stick straight up instead of covering the zipper. So, I went the other way. I'm not hiding the closure. And if you are going to see it anyway, I like a metal zipper. Just a bit of added edge. As I do usually, I set it sort of like an invisible zipper so you don't see stitching on the outside. 

And I can report that I'm not at all disappointed by what it was like to wear this dress. I was a little bit anxious about that. After all, I've given plenty of instruction about how behave when wearing a formal, strapless dress but I had never worn one myself. It's not like wearing a t-shirt, obviously, but this custom-made one stayed in place perfectly and wasn't uncomfortable. The skirt allowed for plenty of room to walk and its ties remained nicely in position and that bolero was just the little cover-up I needed.

All in all, I'm quite pleased with this dress. It may just be the most complicated single item I've made and I'm really glad it all worked out as planned.


May 7, 2015

Building and decorating

We now return to scheduled dressmaking.
I've made some decent progress on my party dress. I'm fairly confident I'll be able to finish it today (we'll have to leave around noon tomorrow to be on time for the wedding, so that's fine).

I think the trickiest bits are behind me now:

I started by sewing the real bodice. Not very difficult in itself (at least not more so than the toile) although I did quite a bit of thinking about the order of construction before I got started. 

According to my design, the grey fabric should be draped over that structured bodice. It's something I have seen A LOT on RTW wedding gowns I've worked on in the past few years. Those have a fairly solid bodice, usually in satin or lining material backed with interfacing, which forms the base for the draping. This is done separately on the front and back and then joined at the side seams.  The top edge is then sewn to a lining which usually has an interfaced and boned bodice. 
There is nothing wrong with this method. It works just fine. If you are dealing with a normal strapless bodice. I'm not. Mine has bra-style cups with underwires. 
I thought about lining it anyway, just to get a clean finish on the inside but I didn't think that would work well. This took quite a bit of thought. I think I just about gave myself a headache trying to figure it out on Tuesday.

This is what I came up with: I do my draping on the structured layer itself, with front and back separate. On this layer, I sew the bone casings with a piece of twill tape at the waistline, passing under the casings (I own a corset on which the waist tape is treated like that). This means the waist tape will have to be 'retro fitted' under the bone casings on the back pieces after sewing the side seams. On this layer, at the inside, there is a cotton lining. Bodice and lining are treated as one layer at their top edge, first when inserting the cups, sewn from lingerie foam and when attaching the fashion fabric. 

This finishing of the fabric on the inside was the most difficult thing to figure out. I didn't want any unfinished edges on the inside. In the end, I've sewn stay tape to the top edge of the bodice (bodice and lining treated as one) and attached the fabric through that, at about 1 cm below the top edge of the bodice (which I cut without seam allowance at the top). Then, I turned it to the outside of the bodice for draping.

The draping is something I haven't really done before and I was a little worried. This is where I could really have used a perfectly sized and shaped dummy which I can put pins in. Lacking that, I used my second hand adjustable one, just pinning the bodice pieces to its fabric cover as well as possible (the cover came loose at the side by the time I was done with the front bodice).

I did know in theory how to do this: The pieces of fabric for draping should be cut on the bias and it's usually more practical to use several pieces to cover such a complicated shape as a busty front bodice. 
I covered the left cup first, than finished the edge of the right one with a separate strip of fabric. Then, I covered the right one and part of the bodice under it. Under that came yet another piece which ends at 3 cm below the waistline. I draped each piece on the dummy, pinned it in place, took it off, sewed it down and then repeated the process for the next bit. 
The back pieces were simple by comparison because they don't have much shaping above the waist. 

Then came the moment of truth: Sewing the side seams. I was really eager to check the fit. I had started to worry about pulling the pieces in with the draped fabric. 
So, after sewing the side seams but before doing any finishing on the inside (like fiddling with that waist tape) I sewed in the separating zipper I had used for the bodice toile and tried it on.

And it fit! In fact, I had to take in the waist a bit more. 
I made the alteration at the side seam, neatened at clipped the seam allowances, dealt with the waist tape and got started on the skirt. 
When I stopped sewing last night, the skirt was on but the center back seam was still open. I actually had to unpick a part of the bodice side seams again in that process because I wanted to have the small bit of draping below the waistline to go over the top edge of the skirt. 

Now, I only have to finish the lining, set in the zipper, do some little bits of hand-sewing on the draping and make that one-piece bolero...

May 5, 2015

5 May

This particular blog post is a little detour in honour of this day. In many countries, 5 May is VE Day, here in the Netherlands, we have a simpler name for it: Bevrijdingsdag (= Liberation Day). An apt name because it wasn't until the total surrender of nazi Germany that this country was liberated in its entirety.
Nowadays, there are two national holidays surrounding the date: There's a commemoration of those who lost their lives in armed conflicts on 4 May, and a 
celebration of freedom on 5 May.  
For this post, I wanted to share a little-known celebration of liberty from 1945 and the years immediately after that: The National Party skirt.

These patchwork skirts were made from scraps of fabric both to celebrate the liberation and to serve as lasting reminders of all the moments in one's life in which garments made from those fabrics had played a part (for those of you who read Dutch, here is a great article about these skirts on the Gemeentemuseum blog, with a picture of a skirt in their collection which is on display in the museum's central hall today).
There seems to be a bit of confusion about when these skirts were first made: According to the article I just mentioned, the National Institute came up with the idea to design something like this early in 1946. According to my period texts, and another part of the same article, women made these skirts in May 1945. All agree about the role of resistance heroine mrs. A.M. Boissevain-van Lennep in designing the skirt.  
I assume patchwork skirts were made in 1945 but the specific design with the orange triangles at the hemline was probably only introduced in 1946. The design was partially inspired by a British tradition to collect memories in a patchwork garment.
It is certain that many were made and many in the 'official' design.

In preparation of Liberation Day 1948, Libelle magazine wrote this:


Do you remember how we made a party skirt from all kinds of fabric scraps for the liberation festivities? Do you not have one yet? Than you should definitely make one this year. For the celebrations in honour of the 50-year jubilee of Her Majesty Queen Wilhelmina, we will wear these skirts in the parade which will take place in The Hague. There will be dances in the national party skirt and choirs will sing a "Skirt Song"
You too will want to wear a party skirt to express your happiness and gratitude.
So start on it now. All the scraps of fabric can come out of your sewing box, personal souvenirs, cherished memories: A piece of your wedding gown, a scrap from your little daughter's first coat, a corner of a table cloth from many years ago, a colourful kerchief.
From all these pieces, we make a harmonious whole, a symbol of  of our women's lives: Unity in plurality, new from old, building up from tearing down. And in the points at the hem of the skirt, we embroider the high points of our national existence: In the two points at the front the date of the liberation: 5 May 1945. On every next point, the year in which you have worn the skirt to celebrate that liberation. In the skirt itself, you can embroider the dates and memories of your own personal life.
When the skirt is finished, you can have it registered; it will get a stamp and will be entered in the register of skirts. This will enlarge the historical importance of the skirt. 
Mrs. A.M. Boissevain-van Lennep, Hondecoeterstraat 8, Amsterdam-Zuid, tel. 27342, will gladly provide you with all information about the "skirt project". You can also send your skirt to this address to be stamped. The register is located at the International Archive of the Women's Movement, Keizersgracht 264, Amsterdam. Registration costs f1,50.
And if you don't have time to make a skirt, an apron is much more quickly made and will also look festive. 

May 3, 2015

Structural progress

With the inner layer of the bodice (of the dress I'm making to wear to a friend's wedding on Friday) finished, I decided to direct my attention towards the skirt and bolero. 
You see, for the bodice I will use a technique of which I have often seen the results and which I understand very well in theory but which I have never tried yet: Draping fabric over a shaped under-layer. It would be almost impossible to determine the size and shape of those pieces beforehand. In fact, in all the wedding dresses I've seen with such designs, the draped fabric was usually sticking out irregularly in the seam allowances. So even in mass production, they don't pre-shape those pieces completely.
So, it seemed wise to cut the other essential pieces before getting stuck in with this tricky process. I don't want to run out of fabric half-way through...

Anyway, I thought the bolero would take a lot of work to deal with issues of gaping edges and maneuverability but it was almost right after the first slap-dash draft. Based on the fit of the muslin, I narrowed the ends of the sleeves a little bit, but that was it. It's just one pattern piece with a fun bat-like shape and I plan to line it.

For the skirt, I wasn't sure. I had two options in mind. Unfortunately, I can still only show you the faint pencil sketches:

Big flounce at the back,

or sort-of sarong-style front drape.
E said he preferred the second option and at first, I didn't agree. That peacock tail back just seemed so alluring...
Then, I started thinking. What would make more sense for a day which will include a lot of sitting and standing around talking to people? 
And yet, I tried a muslin for the back drape option. Maybe just because that 1950's dress looked so good with it...

The thing is, I know how a shape like the one in the sketch would be made using the conventional method of the wedding dress industry: It would be a straight skirt with a big godet at the back and a draped bit over the top. 
But I don't like that. I suppose I have a bit of a Bauhaus attitude to pattern making: I want there to be a real connection between form and function. 
And for this skirt, I kind of liked the idea of eliminating the side seams (even if it were only to avoid having to match them to the bodice side seams). And I had decided I didn't want an actual bow at center back. Too uncomfortable when sitting down. Oh, and to suit the style of the dress, there should definitely still be some draping at the front, like in the picture.
I tried to make a muslin combining all those requirements and it didn't look good at all. So, I got sensible and tried the other option. In this case, I thought tying a bow would be nice so I went with the ultimate style which combines a bow, draped detail and a way to add walking ease: Pattern Magic's knot design (from the first book).

I loosely followed the instructions for the knot dress but placed the knot half-way down on the left front dart. Because the dress will have a back zipper, the skirt had to have a center back seam and that is in fact the only full-length seam. 

I tried it out in some fabric which was left over from a skirt for my sister years ago. On me, the hem looked much more even but at least you can kind of see the effect like this. The knot creates random pleating at hip level which wraps to the back a little bit. There's a fairly deep pleat belong it which will allow me to walk without any trouble. 
Does it work? I've decided to go with it.

I have cut the fabric this afternoon: corselette pieces, bolero and skirt. 

A bit to my surprise, I only used about half of my fabric for the skirt and bolero (which have only one pattern piece each. I didn't plan for that, but I rather like it). So I certainly don't have to worry about having enough fabric for the draping on the bodice. 
Just to clarify: Because the skirt is asymmetric, I'm cutting in a single layer and I traced the sides of the skirt on different pieces of paper but the open space between the straight edge is actually part of the pleat.

I hope I'll get some of the real sewing done tomorrow.


April 30, 2015

The foundation

In fact, I'm pretty pleased with my progress so far, even though I haven't constructed any part of the actual dress yet. I'm getting a pretty clear idea about how I'm going to make it and that makes a huge difference.

I've started at the beginning: By making the fitted bodice with bra-style cups which forms the basis for this design. 

This is a bit of a cross-over between clothing and lingerie patterns so I thought I might talk you through the process I used.
The cup pattern pieces come from my normal bra patterns. A horizontally seamed cup for a strapless design with a curved top edge.
I drafted the bodice from scratch. That seemed easier than fiddling with a body wear sloper with negative and a normal body sloper with positive ease.

To do this you need just a few measurements: 
- Waist circumference
- Distance from the waist to the underwire of your bra. To measure this, tie a ribbon or a piece of elastic around your waist, tightly so it automatically comes to rest at the narrowest point, and measure up from there.
- Underbust circumference
- Then choose how far the bodice to reach below your waist and measure your body's circumference at that level (the ribbon is helpful with this as well)

Then, you can draft the pattern like this:

- Draw a horizontal line the length of half the 'hip' measurement and square up from either end and the middle. Also draw in the waist and underbust height.
- Place the center front of your bra band pattern along the center front line and the bottom of the curve for the cup on the underbust line and trace the bridge, cup curve and beginning of the top of the band.
- Mark 1/4 of the underbust circumference from either side on the underbust line. Square up to the tracing of the bra band and shape the top edge of the bodice.
- For the waist shaping, divide the waist measurement by 2 (because we are working on a half pattern here) and then by 12. Take out 3/12 on either side of the center line, this will become the side seam. Then take out 2/12 in the front panel and 4/12 in the back.
- Connect all the points you've measured out and don't forget to mark the straight grain (perpendicular to the waistline). When cutting, mark the waistline on all pieces and match those marks when sewing.

Of course, a pattern like this may need quite a bit of fine-tuning so I decided to sew it up to try the fit, using the fabric I plan to use for this layer. 
I made the cups from lingerie foam (I think you have to use a material which can stand up on its own for this shape) in my usual way and sewed them into the bodice. 
For fitting purposes, I put a separating zipper at the back.

And this is the fit, with underwires but without boning (and pushed up weirdly at the bottom because of the fabric I put around my hips for the picture). Not too bad, if I say so myself. Later, I sewed poly boning to half of it and it looked even better (I plan on using spiral steel for the real thing). 
Based on this try-out I've made a few changes: I cut the pieces with seam allowance on the bottom but I like the length like this, so I will add 1.5 cm. I really didn't like the way the cup and the top of the bodice look like completely different things where they meet at the side. I raised that point by 1 cm to make them join more smoothly. And finally, I shaved of a couple of millimeters at and just below the waist at the side seam and front dart, because it was a bit loose in those places. 
After that, I spend a lot of time thinking about the order of construction and the way to finish this thing, with the draped fabric on top, neatly. But more about that later.   

P.S. This would also work well as a pattern for a lingerie corset. Just make the center back panel a bit wider compared to the side back, then narrow it about 10% for negative ease. Cut that part out of power net and use something like sturdy satin or lace over non-stretch net for the rest.