December 31, 2014

That was 2014...

In fact, I'm not sure but I don't think I've ever written a round-up-of-the-year post... But today I thought: "Why not?"

Of course, there are things everyone's "year in sewing" will have in common. 

Hits:


In my case, I think my jumpsuit and racerback bra deserve special mention. 

And the simple, cozy dress which really seemed to strike a chord with other sewing bloggers.

And misses:

This gathered monstrosity was all my fault, which is why it is more interesting to include here than the mystery-sized 1930's dress.

And then, there were some experiments: This is the year I re-made my slopers...

And tried my most fitted trouser style yet, to celebrate.

I also experimented with the bias cut. I'm not quite done with that, I think...

I also discovered the brilliant Studio Faro/Well suited blog and experimented with a couple of the designs explained there.

And then, there was the Vintage Sewing Pattern Pledge... 
Probably the biggest experiment of all for me. I was really slow to get started, only making my first item in August. However, I managed to complete my goal: Five items made from vintage patterns in 2014. I didn't quite manage the side goal to sew from each decade from the 1920's to the 1970's but I did explore some new-to-me eras in fashion. 
And the other side goal was to sew using all the different sources at my disposal. Again, I mostly used pattern magazines and didn't even try Lutterloh, but I did make my first Frohne garment and used the instructions from a ladies magazine.
I'm proud of these five:
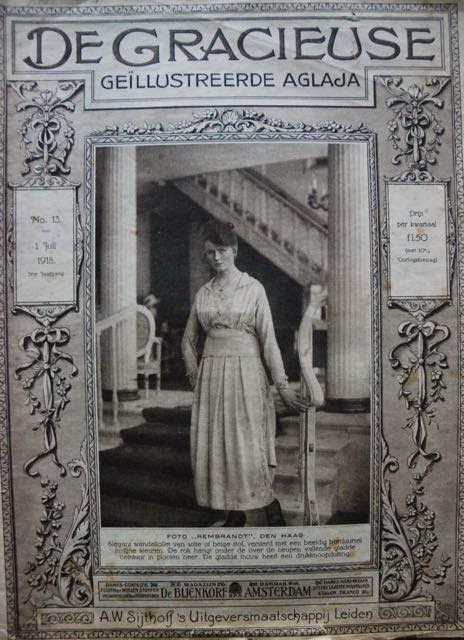
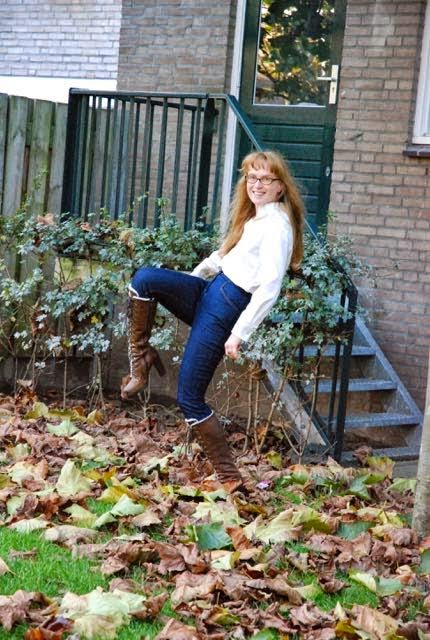

1965 party dress (and no, I don't have enough parties to justify these, I just loved them),


and last but not least my 1950's outfit: 1957 skirt and belt (belt tutorial is here) and 1955 blouse.

Now, all I have left to do is to wish you all a very happy New Year!

December 30, 2014

Sewing Bella?

Hi! I hope everyone had a good time over the holidays. 
I didn't plan a Christmas break from blogging, but it just sort of happened... I didn't really do much sewing either so it's only natural. Today, I thought it was just time to fit in one more normal blog post for 2014.

The thing is, that last minute rush to reach my target for the Vintage Pattern Pledge meant I've spent an entire month sewing only from vintage patterns. Which in turn meant it finally started to feel kind of normal to do so... And I didn't jump to "I could draft that" at every nice vintage dress picture I saw. That was now replaced by "Is the pattern there and is it anywhere near my size?"
Basically, I might be hooked.

When I was looking for a blouse pattern for my 1957 outfit, I started looking in my Bella magazines (because I had sewn from Marion before and not from Bella). Like Marion, Bella was a Dutch sewing magazine which was published for decades (it's actually older than Marion, starting somewhere in the early 1930's as Het nieuwe modeblad but it seems to have met its end earlier. Marion was still around in the 1980's). Unlike 1950's Marion, 1950's Bella was published with all the designs from the magazine included on the pattern sheet. Still only in one size with the others available by mail order, but still.

So, when I was looking for a blouse pattern, I couldn't help but notice some fabulous dresses. Even quite a few in sort of my size (Bella sizes according to bust measurement. At 90 cm, I think all patterns between 88 and 92 cm are close enough to consider them 'sort of my size'). 
And I was planning to make something from some luscious wool fabrics in my stash so some of these look pretty ideal:

The dress on the left. Asymmetry, a pocket, a slim skirt with cleverly inserted room to move. What's not to love?

Always great to have a photograph instead of a drawing. This is a dress from two different materials, not a top and skirt. Very lovely but maybe not so practical with the short sleeves.

A bloused back and trailing sashes at the back! 1950/51 high fashion details which didn't often make it to the humble world of Dutch sewing patterns. And you even get the hat pattern. Unfortunately the front is very plain.

And this one... Raglan sleeves which from the collar, wrap-around effect which ends in a big skirt flounce at the back. Swoon.

A more sporty style (the picture was unfortunately in the middle of the spread so it's a bit misshapen and there's a rusty tack in her head). Normal slim skirted shirtwaist from the front, pleats from a yoke-included-in-raglan-sleeves at the back.

And this beauty on the left. Like the first one, it's asymmetrical and and has extra room added to the narrow skirt using a nice design feature but it's such a different dress.

To be honest, I have already decided to try out the first design. It took some time to trace the pattern and I'm working on the muslin now.


December 23, 2014

1918/22!

Ok, I'm not going to wait another day to blog this. After all, I've also taken these pictures today. 
This blouse was actually finished before the 1957 outfit but I didn't have a chance to take pictures and then I had given the other thing such a build-up (with the belt tutorial mostly) that I felt it had to be shown off first. 

I did talk a little about my intention to make this blouse here on the blog. Mostly about how watching a lot of Downton Abbey gave me a whole new appreciation for the fashion of the late 1910's and early 1920's (if you've missed that post, I've shared some pictures of designs from 1918 here). 

I had noticed a particular style of blouse which is often worn in season two. Both by the young ladies and by Anna when off duty. This very style was also featured quite often in my Gracieuse magazines from that time (I only own two from 1918, the others are from 1920 and later). It looked very nice, so why not try and make it?

The pattern I used was the bodice of this dress from 1922 (the one in the middle). I would have preferred an actual blouse pattern but each Gracieuse magazine includes just one or maybe two patterns per size so this was the closest I could get in time, style and size.

The fabric is some black crepe left over from my 1929 dress and I decorated it using black satin piping and some beige-ish/pink-ish crochet lace ribbon which I've had in my stash for years. Black ribbon would have been more in line with the original design but I didn't want the end result to look like a mourning piece. 

I only realized later that decoration on these 1910's/1920's blouses always matches the main fabric... The contrasting stuff and the placement of it might even look a bit 1970's even though the shape doesn't really.
And then there's the lack of any instructions with these patterns. During construction, I wondered about the need (or lack of it) for a closure. I tested whether or not I could get the blouse over my head without. Because I could, I didn't make any kind of closure. Since then, I've noticed that the Downton blouses usually have a concealed button band at one side of the central panel. 

The collar is a separate piece. Normally, I don't like that for a shawl collar. It just seems like either lazy drafting or an assumption of ignorance of the seamstress. In this case however, the curve of the pattern piece makes this collar behave and look different to a cut-on one. So here, it's functional and that makes it OK.

The blouse is very roomy and really comfortable. I had some trouble finding a way to wear it. I like the look with these trousers but all my high waisted skirts have rather clear 1950's silhouette and just look weird with this blouse. I don't mind it though. I was already planning another pair of trousers using this pattern (in black wool crepe) and I could always make a more period accurate skirt. 
I don't think I'm done with this design either. There's a lot of charm to it and plenty of potential to update it and make it work in a modern wardrobe.

And this completes my Vintage Pattern Pledge! I've sewn five items from vintage patterns. They've been kind-of spread across the decades between 1910 and 1980 and I've used some of the different pattern media at my disposal (I could have done better at both of these points but I have moved out of my comfort zone in both areas so I'm not judging). 
It took me a long time to get going with this pledge. I've been drafting all my patterns for so long that I really had to struggle to get back to using pre-made ones. Even if I was curious about period fit and drafting style. 
In the end, four of the five items were made this past month. After I had decided to throw caution to the winds and just go for it. And now, I find myself thinking about vintage patterns much more. I want to use my raspberry pink wool crepe for a mid-1920's dress and the table in our living room is filled with early 1950's Bella magazines which include some amazing dresses...
Of course I won't stop making my own patterns but I this challenge may just have helped me get over the barrier and use my lovely vintage patterns the way they were meant to be used.
So thank you Marie, for coming up with this great idea! 

1957(ish)!

Well, thanks to the vagaries of Dutch winter weather (not cold at the moment but windy rainy and generally rather glum) it took me a while to get pictures of this outfit. On the other hand, I was lucky that E has taken this week off work and didn't mind being forced into the role of photographer on Tuesday morning. 

This is my 1957 outfit, made using a tutorial for the skirt and belt from the issue nr. 4 of Libelle magazine from 1957.


The whole look is based on this picture, from the mailorder pattern section from nr. 5 from the same year. I tried to get a picture in a similar pose but that proved really difficult. I didn't have anything with the right height to lean on so it felt really awkward. Looking at the my attempts when sorting the pictures for this post just made me feel scruffy and waistless... 

To complete the look, I obviously needed a blouse pattern. One from the same year would have been ideal but my collection didn't provide one. 

This little number (on the right), however, is from sewing magazine Marion from 1955. From the March issue. It shares a lot of the characteristics of the blouse in the picture: kimono sleeves (at least at the front. The Marion blouse has set-in back sleeves), no button band and less-than-full-length sleeves with turn-back cuffs. I chose not to mind about the fact that it has tucks at the waist instead of darts but of course, I did feel the need to alter the collar. I kept the original neckline and button positions (those three are the only buttons at the front of this blouse. Obviously it was meant to be only ever worn tucked into a high waistband) and drafted a very simple convertible collar to use instead of the stander and mini-size rounded collar the pattern came with. 

Skirt and belt were made following the tutorial but adapted to my waist size and didn't really cause any surprises (and I've made my own, more detailed, tutorial for this belt in the previous post). It was a bit of a shame the instructions didn't bother with enforcing a particular skirt length. That would have been interesting. On the other hand, I've read enough 1950's (and 1940's and probably from earlier times as well) fashion news to know that a truly stylish lady defines her skirt length by the distance from the hem to the ground. Measured while wearing the appropriate shoes for that outfit, of course. 

I was pleasantly surprised with the blouse. I've tried Marion patterns twice before and both of those times, I was rather underwhelmed with the result (a dress and a coat which didn't get beyond the muslin stage). I guess this teaches me not to go for the size 36. That may be very close to my bust measurement, it's considered to be a 'transitional' size, a point between the sizes for girls and women and apparently, that means a seriously shorter back waist length. Part of the difference will also be down to rather simple matters: for a blouse like this, the fit has to be right through the shoulders and bust, the rest doesn't matter as much. For the coat, it was mostly the lack of shaping at the waist and flare of the skirt that disappointed me. Oh, and in this case, the picture from the magazine was definitely not what drew me to this pattern.   

For the purpose of the Vintage Pattern Pledge, I'm counting this outfit as two patterns, because it is. 

December 19, 2014

The Dior belt

I hope you're going to like this. My earlier post about this outfit didn't inspire any enthusiasm but on the other hand, tutorials tend to be popular...

Just imagine this: The year is 1957, the month February. Of course, you've seen the new designer fashion in magazines since the start of winter and of course, there was a new line by Christian Dior (which would be his second to last because he died in October of that year, but there was no way to know that in February). And then as now, such reports in ladies' magazines are purely 'aspirational'. There's just no way a normal woman could afford such exquisite garments. But it's nice to see the direction in which fashion is going (the influence of Paris on everyday fashion was much stronger back then) and maybe to take some inspiration for your own sewing.
By February, it will be clear which elements of designer fashion have crossed over to a larger audience and the 'Dior belt' is a clear winner.

It's a wide gathered belt most often seen worn over full pleated or gathered skirts (the belt in this picture is actually not a Dior belt, it's a regular smooth one). But, contrasting or matching, it can be paired with other clothing as well.

The trend has been eagerly taken up by the RTW industry and everyone, who can pull off the look, seems to be getting in on it. And now, thanks to your friendly weekly, so can you. And now in December 2014, thanks to this vintage-loving blogger, so can you.

In fact, this description (my how-to here is based on the one in the magazine but that one is so vague I've changed it quite a bit to allow you to actually follow it. Which is also why I don't feel like I'm breaking their copyright) is the earliest designer rip off pattern I've ever seen. Some magazines occasionally bought couture designs and offered those to their readers as patterns but this is different. This didn't come down that official route.

For the belt, you need about 90 by 90 cm of fabric, 3 or 4 pieces of boning of 8 cm long (the poly stuff is fine for this, in fact, better than something you can't stitch through. Just don't forget to meld the ends they can't unravel or prick through the fabric) and 4 hooks and and eyes.

Fold your fabric diagonally. You have to draw the belt along the fold, so it will be on the bias. For the width, measure 27 cm from the fold, the length should be the same as your waist length (do not add seam allowance to these measurements. Fabric stretches on the bias and this belt needs to be a bit snug to look good).

Cut out the rectangle and sew it together along the open sides using a small stitch (so the stitching won't break when the fabric stretches out). Leave a small hole to turn the whole thing. I made mine at one of the sides so the stability of the belt edge is not compromised by hand stitching. Turn the belt right side out and press.
Now, you have to decide whether you want your belt to close at the side or at the back (the closure on a Dior belt should be hidden so it is never at the front). Mine is at the side and I think it is easier to open and close that way. 

For a side closure you will need to gather and insert boning at three places: Both ends and the middle. At each of these places, machine baste two vertical lines, far enough apart to accommodate your boning. At the bottom of each of those lines, unpick a few stitches of the seam you made before. Insert the pieces of boning and gather the fabric on them. Fix in place by sewing over the gathers and the piece of boning. To stabilize everything and close the little holes, I then stitched around the pieces of boning, over the lines of basting and the top and bottom of the boning channel. 
Then, sew the hooks and eyes to the ends of the belt.

The belt is supposed to be worn from the waist up and because of that, I prefer to wear it with the seam on the bottom because that edge will stretch less.

I hope can follow this and I'll show you my version this weekend, when I've had a chance to take pictures.

December 17, 2014

Just in case it applies to you

This is just something I came across yesterday. I thought I would mention it here on the off chance that it is of interest to some US based reader of this blog:

Fashion business platform FashionUnited is looking for Fashion Editors in New York and Los Angeles. You need to have two years experience writing for a news provider, an interest in fashion and its business and to live in the city in question. 

Just click on the cities to go to the job ad in question. It sounds like it could make a pretty cool job for somebody.

December 16, 2014

Another change of plan

At the moment, dark dreary rainy days and bright and cold ones seem to alternate. Unfortunately, that fact kind of conspired with our social obligations last weekend so I didn't get the chance to take pictures of my new 1918/1922 blouse. It is finished and I like it but I may need to make a different style of skirt to go with it. My high-waisted skirts are all just a bit too eh... 1950's. 

In the mean time, I have been busy and I am getting close to completing my Vintage Pattern Pledge target but I still haven't been working on a Lutterloh project. I'm now officially postponing that till spring (I hope there will be another Vintage Pattern Pledge for next year...). 

You see, although I keep saying I don't need more fabric, it's impossible not buy when it's good stuff at bargain price. Especially at the market. If it's there and it's both good and cheap, there's a good chance it won't be there anymore next week. And the usual reason for good fabric to be sold cheaply is that it is a leftover from somewhere (a production atelier, a fabric store going out of business, you name it) which means there won't be any more once it's gone.

With the excuses out of the way, I can tell you that I found deep red wide wale corduroy at 1 euro a meter. Corduroy can be tricky to sew with and it's fabric which easily looks dated but I liked this stuff. And I immediately remembered a pleated skirt tutorial in one of my 1950's Libelle magazines (and magazine tutorials were also one of the vintage pattern media I wanted to try out this year). So, I bought two meters.

After some searching, I found the tutorial in question. It's actually for the whole outfit: Short jacket and pleated skirt. I'm not making the jacket now. 
The whole tutorial is for size 40 which, according to the Libelle sizing table is one size too big for me but for the skirt, that should not be such a problem. The skirt is quite simple: just a rectangle pleated into a waistband. What is nice about this version is that it alternates deep double pleats with little ones. Eight of each. With that many pleats, it's easy to pinch out 4 cm more. 

With the skirt almost done, I found out that the tutorial also includes instructions on how to make a belt which was rather popular in the winter of 1956/57.
It's not visible in the pictures which go with the tutorial but it is something like this:

This outfit shows a mailorder pattern which was offered in the next issue of the magazine. Pleated skirt, belt and a classic 1950's blouse. In colours close to that of my skirt and of some other fabrics in my stash....

So, now I've decided to try and copy this very look. Of course, it looks like it is made from silk and I'll be using cotton fabrics so it won't be as fancy. Still, it seemed like a nice idea.

I spent some time yesterday evening looking through my 1950's patterns for a blouse which would work for the purpose. Which wasn't that easy. There were many more dresses than separates in any 1950's sewing publication.
And of course, they only printed each pattern in one size, so I had to get lucky with that as well.

I finally found this one, the blouse on the right, in Marion magazine from October 1955. I'll have to change the collar but other than that, it's pretty much spot on. And in my size.

I've just traced the pattern (and I repeat what I've said before: If you complain about modern Burda pattern sheets, don't try these vintage ones). I like the cut of the sleeves: They are kimono sleeves with underarm gussets at the front and set-in sleeves at the back. 
I've measured the pattern pieces for possible issues with back length but that seems to be fine. So, I've decided to just go ahead and cut it out in some blue cotton from my stash. 

So hopefully, I'll have a picture perfect mid-1950's outfit ready for its moment in front of the camera this weekend.

December 12, 2014

Said pretty things...

Yesterday's post was already getting a bit long and adding these would have been a a bit 'off topic'. So the pretty things which distracted me from my Luttorloh plans get a post all of their own.

The blouse I am working on is from a pattern from March 1922 but the shape was already popular in 1918. How I know that? Not just because it is the exact same shape as the one worn by lady Mary (from Downton Abbey) in the picture in yesterday's post. I've got real, period proof.

This is the cover of Gracieuse magazine of July 1918.

Doesn't this dress look like something Lavinia Swire would wear? (sorry, Downton geeky-ness is showing badly). More importantly: Look at the bodice. It's the exact same shape as the one I'm making. The only difference is in the waistline. Which I won't use in my blouse anyway.

In fact, I think I've found a whole new appreciation for the fashion of the late 1910's and early 1920's. 

All these images come from the same magazine.


Yes, they don't look like something you would wear just like that nowadays but they are really nice...


In some ways, the natural height waistlines makes these seem more wearable than many 1920's fashions.

I really should try and make a dress like this...

December 11, 2014

How I got sidetracked by history, TV and pretty things...

Let me start by thanking everyone for the advice on the buttonhole issue I mentioned in the previous post. Thankfully, I've got lots of scraps to try different methods on so I will try everything you suggested and hope for the best (because my grandmother specifically wanted those functional buttons. I tried suggesting snap/poppers).

In the meantime I seem to have allowed myself to get thoroughly sidetracked. I can name reasonable excuses, like I started to read a bit more history again (extensive overview of the Ottoman Empire, at the moment) and I started following some history blogs, which led to me finding lots of history blogs (I've started weeding through them but with blogs, you often have to follow for a bit to know whether or not a specific one is for you). However, neither of those things should really keep me from going on with sewing projects I'm already kind of committed to...
And then, about two months ago, we bought a new television (the old one was pre flatscreen era...). A 'smart tv'. So, we also decided to try out Netflix... Which is how I finally got to watch season five of Mad Men.
And now, I'm really enjoying watching all of Downton Abbey. I've seen most of season two and about half of season three when they were broadcast by Nederland 2 but I really enjoy seeing how it all fits together.
I'm at the end of season two now and it has taken this long for the look to really get to me. 
Last week, when I tried to make a decision about which Luttorloh pattern to try, my mind kept wandering to how nice the daytime blouses at Downton are...


Mostly the ones worn by the daughters of the house, especially Mary (I like her look best anyway. She may not always be the nicest person but the lady has got style. And I'm an oldest sister myself so I guess I'm prejudiced). 
Something like this is very pretty and I even think it could work in a sort-of-modern wardrobe. In mine at least. I've got enough high waisted trousers and skirts to tuck such a top in to.

All of that made me have another look at my picks from the 1920's Gracieuse magazines.

The very first design I picked back then, the dress here in the middle, actually looks a lot like many of the blouses I had been admiring. 
So, why not use the bodice of this loose dress as blouse? It could even count it towards my goal in the Vintage Pattern Pledge...

So that's what I'm working on now. I'm not being hugely original because I'm using the fabric leftover from my 1929 dress but there will be some trim, which is really unusual for me. 

The pattern is quite interesting:

For the blouse, I'm only tracing the over bodice (which is in three pieces on the tracing sheet), the center front bit and the collar. But I thought it was really interesting to see that the dress has a more fitted, and clearly intended as structural, lining and a belt which has to be made to specific measurements. The skirt is only given as scale drawing because that's just a rectangle. 
I really should make a dress like this at some point. But there are nicer ones and right now, I want a blouse.

Despite the fact that the bodice looks quite long in the drawing, I checked the back measurement (when in doubt, always measure!) and I'm glad I did. The center back was only 37 cm long. This would put it well above my waist (I have the now normal back length of 40 cm). I'm not sure what's going on there. It may have something to do with the fact that this pattern is intended for teenage girls (who, in modern patterns, are supposed to be at least as tall as women with the same bust measurement but I have noticed a different notion in more recent, 1950's, vintage patterns as well). Or maybe the drawing is just more fashion-forward than the pattern. In the early 1920's waistlines were getting gradually lower and this is a dress for official and solemn occasions so I think it's a reasonable working theory.
Anyway, I lengthened my bodice pieces by a whopping 17 cm so I would have something to tuck in. 
Hopefully, I'll manage to get some nice pictures of it this weekend. 

December 9, 2014

Selfless sewing?

The sewing I do in my own time is mostly for myself. I think I have that in common with a lot of sewing bloggers. Sure, I also make a lot for the man in my life but usually, that's it. Apart from the occasional alteration for a family member. Or a baby gift. Or an unusual clothing need (trousers for my mother when she was waiting for her second hip operation). I've stopped doing assignments for friends (who did pay for it) after three customers because it took so much time...

Put like that, it sounds like I actually do a lot of selfless sewing but it's all about proportions. I really don't.
I'm working on something right now though. And to be honest, I'm not enjoying it.

A little over a year ago, I made a fairly fancy long sleeved t-shirt for my maternal grandmother (the same grandmother who is knitting for the whole family). She showed me a picture of the kind of style she wanted, we went to the fabric store together to buy the fabric and I made the top using Burdastyle's Lydia (a plain long sleeve t-shirt which I can't find anymore on the site now) as a base. 
Back then, I made a muslin first and had a fitting session with that. I was glad I did. My grandmother in her 80's and at that age one's body shape has really changed. Thanks to our care in fitting though, the shirt I made for her fits well and looks pretty good. She wears it a lot.

I noticed and started thinking about making another one. I just didn't know what colour she would like. When I discussed this with her, she told me she would like a top with a front closure because that is easier to get in and out of. 
This time, she bought the fabric herself and she had some different pictures of what she wanted.

And made this sketch (which is a crumpled because it has been in my bag for a while).
So far, so good. Of course, I am willing to make a garment which suits her wishes and requirements. However, the fabric, a nice double-face jersey which is burnt orange on one side and black on the other, is rather soft and drape-y (but has no vertical stretch, which is good in this case). Not at all what I would want for a tailored look like this.
To make my job easier, she wanted the front pockets to be fake. So, those are just little flaps which I will sew down later. It's just that I really don't like fake version of functional details...
Which is also why I didn't like doing princess seams in this case. 
The collar is fairly simple, just really annoying to make in this fabric. Especially if you have to unpick and re-do it. I hardly ever need to do things like that anymore but I did now. When I started on this shirt, I made a cut-on straight fabric (I had thought about making the center front double, for a clean finish but decided against that because it would cause bulk at the 'pockets' and make the front so much heavier than the back that the whole thing was likely to sag forward). It wasn't until the collar was almost finished that I realized how bad that facing would look if the collar would be worn half open. So, off it came. I made a new facing which, at its top, extends to the shoulder seam and put the collar back on. 

That's when I thought I was almost there. Just the cuffs to go on. And the hem. And buttons and buttonholes. 
It took me a while to find the right buttons (which I did before starting on this). Gran wanted mother-of-pearl but not the small ones you get on shirts. I finally found the right medium sized mother-of-pearl buttons when I was picking up my sewing machine from its repair.
And now, I tried to make a buttonhole. I started with the easiest piece to do that on: a cuff which was still separate. And of course I had stabilized it with some thin fusible interfacing for stretch fabrics. And it didn't work. Whether I tried the official 'stretch fabrics' buttonhole or a normal one, my sewing machine would not make a buttonhole in this fabric. I tried everything and when I tested it on a scrap of other fabric, it stitched those buttonholes without a hitch.
I've given up for now. I'll see my grandmother on Christmas Day, so the shirt should be finished before then. I could try layering the fabric with tracing paper under it. Or even with one of those fancy special materials they have for that purpose.... I don't know.