June 15, 2020

Subtraction cutting again!

After my very simple dress, I decided to change gears and make something more complicated. I didn't make all those tiny dresses for nothing after all...

The design I used as a starting point is the second one from this post. In many ways, it is the simplest one I tried and probably the least typical for the technique. But that also makes it the most likely one with which to get a wearable result for what is really still just me trying it out. 

Most of the subtraction cut dresses you will find online have very simple, loose fitting sleeveless tops. I didn't really want that and I have cut the same bodice as the one I used for my recent dress. It will have buttons from the waist up and a side zipper.
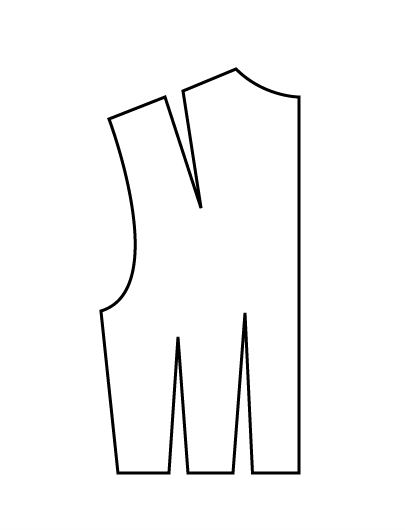
Because I got the scale of the bodice wrong on the tiny dress, I didn't have quite as much length to cut holes for the skirt as it seemed in small scale. When I was marking the circles out for cutting, I realized that the bottom set on the front of the dress would end up too close to the hemline. So, I didn't cut those holes. (I'll make a proper pattern lay-out drawing when I post about the finished dress)

If you read about subtraction cutting, some people who tried it are very enthusiastic about how quick this technique is. If you read that, have a good look at the pictures. Many of those quick dresses are no more than muslins with raw edges at the armholes and neckline and over-long, unhemmed skirts spread on the floor. In my book, those are not finished dresses. 
Making it a nicely finished dress doesn't require any special skills but it does mean constantly dealing with quite a lot of fabric around the sewing machine. 


So far, I have put the bodice together but it still needs sleeves and a collar. I have also sewn up those holes.
The skirt doesn't have anywhere near the volume of that in the tiny dress (but a bit more than it seems on the dummy).


The strange thing I noticed when I tried it on was this:


The hole from the back is all the way down at my ankles. Deeply unpractical and it doesn't really do anything for the shape of the skirt. I tried connecting it to the top one at center front and that seems to work well. It creates that bustle-effect at the back which attracted me in the tiny dress (you can kind of see it in the side views but not really well enough. The lighting doesn't help. I'm sorry about that but I didn't have much time to take pictures)
The skirt is also too long. On the dummy, it almost looks like I could make that second set of holes after all but when I wore the dress, I really didn't think so. What I think I'll do is simply cut off about 40 cm at the bottom and then hem it. Unlike on the first dress I tried, the bottom edge of this one doesn't cross extra seams. That should mean I end up with a hi-low effect because the bustle hangs down to about the ankles. And the cut-off length will give me the extra fabric I need for the sleeves. 

I'll keep you posted on the progress!

June 11, 2020

Super-simple dress

Here's another one I made a couple of weeks ago. A very simple t-shirt-dress in a nice cotton jersey. 


I used the same old trick again to jazz it up a bit: I used a picture of a small bird in flight traced the lines to make a print on the dress. 
Very easy to make but I'm sure I will wear it a lot.

June 3, 2020

The action back

Fitted bodices can really limit your range of movement. Of course, that can be down to a fitting issue but not necessarily. Some styles are just inherently restrictive (just ask anyone in a tailored jacket to hold out his/her arms out to the side at a right angle to the body). Perfect, individualized fitting can make the most of any style but that is a difficult job (one I should try and tackle once I'm fairly certain my shoulders will stay the same shape for a while).
Styles which allow for a great range of movement are traditionally wider and more casual in look. I say traditionally because a lot of that job is done nowadays by elastane. 

The pattern adjustment I used for my dress and jumpsuit is intended for fabrics without stretch. In fact, it is kind of like the "action back" on some casual jackets (for men as well as for women) from the 1940's. The adjustment adds room for movement but confines it in the general, fitted shape of the design.
It is easy to make using a sloper or a tried-and-tested pattern for a fitted bodice with sleeves (as ever, my drawings are not to scale) 


Your pattern will need a waist seam to make this adjustment possible. If your sloper doesn't have a waist seam, just cut it at the waistline.


Draw a line for the back yoke. My sloper has fairly long shoulder darts so my line crosses the shoulder dart. The line should be between a third and half the height of the arm scye when measured from the top.


Trace the yoke pieces fit them together. Here you can see that my drawing isn't very good. There shouldn't be a big dent in the shoulder line (there will probably be a small one. If there is, just keep it).


Clean up the shape of the yoke. It will end up with a slightly curved bottom edge. 


Draw lines from the tops of the waist darts (or dart, if the pattern you are using has only one) to the bottom of the shoulder dart. If you had a shorter shoulder dart, draw the lines to the point on the yoke line under were it ends.


Cut the lines and close the darts. This will transfer all the width from the darts to that one point on the yoke.


Mark the edges of the pleat.

Add seam allowance to the pattern pieces if you like. Both pieces should be cut with center back on the fold. 
Fold the pleats closed before sewing the lower bodice to the yoke.
I usually cut the yoke piece twice. I use one as a lining and sew the yoke seam and shoulder seams so that all seam allowances will be encased between outside and lining. 

June 1, 2020

Jumpsuit time!

Here is a new item of clothing I couldn't even try and photograph on the dummy: I have made another jumpsuit!

This is another thing which will be familiar to you if you have been reading my blog before. I like jumpsuits and I have made lots of them, in various styles (there are even some which never made it to the blog. When the weather cools down a bit, I will take pictures of my favorite jumpsuit from the great blogging hiatus). All the jumpsuits I have made, have been my own designs and my own patterns. I think that really contributes to why I like them. After all, few garments are harder to fit... Body length issues can be terrible with jumpsuits (just try out some RTW ones). If you would like to draft your own, I made a tutorial for it years ago. You can find it here. For the tutorial, you will need your own bodice and trouser slopers (or tried-and-tested patterns) but I explained how to connect those together. Oh, and I don't think I included this at the time but the straight grain should always run along the center of the trouser legs (so keeping the original grain line on the trousers)

This particular jumpsuit was made in the dark blue cotton/linen blend I have used before. It's a nice, comfortable and hard-wearing fabric and years ago, I bought the rest of the bolt which was still about 30 meters. I'm still happy to have lots of it. I have used it for jumpsuits, jackets and trousers for myself and a jacket and trousers for E. It's just a nice go-to material for spring and summer.

It has the same sleeves and back as my dress (and I finished it before I promised to show you how to make those) and even the same collar but it has a wrap front. Obviously, the wrap-over bit extends below the waist seam, in the wide legged trousers. I made one mistake though: I made the hole to pull the tie through in the left side seam which means the wrap is tied at the right hip and closes left over right... Which is actually the wrong way round. It doesn't bother me though, so I won't change it.